close

Reuben Henrik

Moving

Residential Relocations Done Right: A Practical Guide for Perth Homeowners

Couple stands by an open moving truck as movers load cardboard boxes inside the trailer.

There’s a particular kind of optimism that accompanies the early stages of planning a house move. The new home feels like a fresh start. The decluttering feels like freedom. The idea of professionals arriving and handling everything feels like simplicity itself.

Then reality arrives, usually about three weeks before moving day, in the form of thirty years of accumulated possessions that all need to be sorted, packed, insured, and transported to a new address without being damaged, lost, or forgotten behind the hot water system.

Residential relocations are not simple, even when they’re local. They become considerably more complex when settlement dates don’t align, when high-value items need specialist handling, or when the move coincides with a major life transition, a divorce, a downsizing after the children have left, or a move to be closer to family. Getting it right means treating the move as a project, choosing the right professional support, and understanding what’s genuinely involved before you start.

This guide is for Perth homeowners who want to do exactly that.

The Downsizer’s Relocation: What Nobody Warns You About

Residential relocations for empty nesters and downsizers are among the most emotionally and logistically complex moves in the residential market. The volume of possessions typically accumulated across a long-tenured family home, the sentimental weight of many of those items, and the challenge of matching a full house’s worth of furniture to a significantly smaller property creates a set of challenges that a straightforward family relocation doesn’t.

The first challenge is sorting. Decades of accumulated contents — furniture, books, clothing, kitchen equipment, garden tools, holiday decorations — need to be categorised: keep, sell, donate, or discard. This is time-consuming work, and it’s work that requires energy and emotional bandwidth, not just logistical capacity. Starting this process at least eight to twelve weeks before the move is not excessive — for a long-tenured family home, it’s realistic.

The second challenge is storage. Downsizers frequently find themselves in a position where they want to keep items they don’t yet have room for in the new property. Long-term container storage is the professional solution for this situation. Your items are held in a secure, weatherproof container until you’ve had time to settle into the new property and make considered decisions about what stays and what goes.

Residential removalists in Perth who work regularly with downsizers understand this dynamic and structure their services accordingly — full pre-packing capability, integrated container storage options, and the patience and care that high-sentimental-value possessions require.

Residential Relocations and High-Value Items: What Requires Specialist Care

Not all household contents move the same way. A standard bedroom suite and a Steinway grand piano are both furniture, but they require entirely different handling protocols. Understanding which of your items fall into the specialist category — and confirming your removalist’s capability before you book — is an important part of the pre-move due diligence process.

Pianos. Upright pianos and especially grand pianos are heavy, mechanically sensitive, and awkward to manoeuvre. Moving a grand piano incorrectly risks both the instrument and the floor it’s moving across. Specialist piano handling requires dedicated equipment and trained operators.

Antiques and heritage furniture. Items with age and provenance are irreplaceable if damaged. Specialist wrapping — acid-free tissue, custom padding, appropriate box sizing — and careful load positioning during transit are non-negotiable. Ask your removalist specifically: what is your protocol for antique furniture?

Original artwork and sculptures. Large or valuable artworks may require custom crating. The packing materials that protect a reproduction print don’t protect a valuable original. If you have significant artworks, discuss this explicitly at the quoting stage.

Large mirrors and glass-topped furniture. These are common damage points in residential moves. Purpose-made mirror boxes, corflute sandwiching, and careful load positioning are the standard professional approach — confirm that your removalist uses them.

Wine collections. Wine is sensitive to vibration and temperature. Large collections should be discussed with your removalist upfront — specialist wine transport packaging and temperature considerations may apply.

Choosing a Moving Company in Perth: What the Market Actually Looks Like

The Perth residential removals market is competitive and varied. The range extends from highly professional, fully insured, AFRA-accredited operators with decades of experience through to cash-in-hand operators with a van and a phone number.

Price variation across this spectrum is significant. The question worth asking is not “why is this company cheaper?” but “what’s different about their service that explains the lower price?” The answers are usually revealing.

AFRA accreditation is the clearest professional baseline. The Australian Furniture Removers Association accredits operators who meet standards across staff training, vehicle maintenance, insurance, and professional conduct. An AFRA-accredited moving company in Perth is operating under a framework of accountability that non-accredited companies are not.

Insurance transparency. Before booking any removalist, ask specifically: what does your insurance cover, per item and in total? What is your claims process if something is damaged? A professional operator will answer these questions clearly and in writing.

Review patterns. Aggregate star ratings are less informative than the pattern of reviews over time. Look for reviews that specifically mention care with fragile items, communication during transit, and the team’s conduct on moving day.

Full-service vs transport-only. A company that offers pre-packing, storage, specialist item handling, and disassembly/reassembly in addition to transport is a fundamentally different service offering from a transport-only operator. Be clear about what you need and confirm that the company you’re evaluating genuinely provides it.

Perth Storage Containers and Storage Solutions: Planning the Bridge

One of the most common complications in Perth residential moves is the settlement date gap — the window between vacating your old property and gaining access to your new one. Perth’s property market, with its sometimes unpredictable settlement timelines, makes this gap a planning consideration for virtually every homeowner.

Perth storage containers offered through specialist removalists provide the professional solution. Your goods are packed once, loaded into a weatherproof container, and stored securely until your new property is ready. The container is then transported and delivered — without unpacking, repacking, or additional handling.

The advantages over traditional self-storage are significant. Self-storage requires you to move your goods twice — into the storage unit, then out again into a truck, then into the new property. Container storage eliminates the second move. Your goods remain in the same container from packing to delivery, which reduces both the labour involved and the risk of damage in additional handling.

Storage solutions in Perth vary in flexibility, security, and access arrangements. For short settlement gaps (one to four weeks), a flexible container storage arrangement managed by your removalist is typically the most practical option. For longer-term storage — renovations, overseas assignments, extended downsizing decisions — more permanent facility arrangements may be more cost-effective.

Whatever your storage requirement, organise it before you need it. Last-minute storage arrangements are expensive and stressful; planned storage arrangements are straightforward.

Furniture Removals in Perth: The Pre-Move Conversation

Furniture removals in Perth benefit enormously from a detailed pre-move conversation between the homeowner and the removalist. The more information the removalist has before moving day, the better they can resource the job, plan their approach, and provide an accurate quote.

Here’s what to cover in that conversation.

Access at both properties. Stairs, number of floors, lift availability, distance from truck to front door, driveway width for truck access, any body corporate restrictions on moving hours. These factors directly affect time, staffing, and equipment requirements.

Large and specialist items. Pianos, pool tables, large outdoor furniture, gym equipment, king-size beds, and sectional sofas all have specific handling requirements. List them explicitly.

Disassembly requirements. Which items need to be disassembled before the move and reassembled at the destination? Modular wardrobes, bed frames with storage, and large bookshelves are common examples.

Packing scope. Are you self-packing entirely, partially, or do you want the full pre-packing service? If you’re self-packing, the removalist needs to know which rooms will be ready and which may still be in progress on moving day.

Timing sensitivities. Are there any items that need to be available immediately on arrival — a child’s bed, critical medications, work equipment? These should be loaded last and offloaded first.

Moving Day: How to Make It Go Smoothly

Moving day itself is not where you make decisions — it’s where you execute the plan you’ve built. Here’s how to help the day go well.

Be present and available. Your removalists will have questions throughout the day. Having someone available to answer them immediately prevents delays.

Keep children and pets managed. Children underfoot and anxious pets create genuine safety risks in an active loading environment. Arrange care for them or designate a contained space away from the loading activity.

Have refreshments available. It sounds minor, but a removalist team that’s had water, coffee, and a morning tea break works better than one that hasn’t. This is not sentiment — it’s practical.

Do the walkthrough. When you think the loading is complete, walk every room, wardrobe, cupboard, attic, and storage space before the truck leaves. Things are left behind more often than people expect.

Conclusion

Residential removalists in Perth, managed well, are one of life’s genuinely positive events, the physical beginning of a new chapter. The key is treating them as the substantial undertaking they are: planning well in advance, choosing a capable and accredited removalist, preparing honestly for the emotional and logistical complexity involved, and using professional storage solutions to manage the inevitable timing gaps.

The move will not be perfect. But with the right preparation and the right team, it will be manageable and the other side is worth it.

read more
Moving

How to Pack Electronics Safely for a Move

Relocating to a new home involves orchestrating hundreds of moving parts, but packing delicate electronics presents a distinct set of challenges. Modern consumer electronics represent a substantial financial investment and contain sensitive internal mechanisms, brittle circuit boards, glass displays, and irreplaceable personal data. A single sudden impact, static electricity discharge, or dramatic temperature shift during transit can render an expensive device completely unusable.
Preparing your digital footprint and physical equipment with systematic care ensures that your gear arrives at your new destination intact and ready for immediate deployment. By following professional packing protocols, utilizing appropriate archival materials, and establishing clear organization, you can eliminate the stress of moving high-value electronic items.

Preparing Your Electronics Before Packing

Proper preparation begins well before wrapping tape around a cardboard box. Taking deliberate steps to safeguard your hardware and software ahead of time saves hours of troubleshooting and prevents catastrophic data loss.

Back Up All Critical Digital Data

Hardware can be repaired or replaced under moving insurance policies, but lost personal photographs, work files, and system configurations are permanent losses.
  • Cloud Backups: Synchronize primary hard drives to secure cloud storage platforms a few days before your scheduled move date.
  • External Physical Storage: Create dedicated physical backups of desktops, laptops, and gaming consoles on encrypted external solid-state drives or thumb drives.
  • Personal Separation: Pack external backup drives in your personal vehicle or carry-on bag rather than loading them onto the primary moving truck.

Document Cable Configurations and Ports

Reconnecting a complex home theater receiver, multiple monitors, or a mesh router system can quickly become overwhelming when faced with a tangle of unlabelled cords.
  • Photographic Records: Take clear, well-lit close-up photographs of the rear input panels on your televisions, soundbars, audio receivers, and desktop computer towers before unplugging a single wire.
  • Labeling Wires: Wrap small strips of colored masking tape or pre-printed cable flags around both ends of every power cord, HDMI cable, audio line, and display connector, noting which port it corresponds to on the source hardware.

Remove Batteries, Media, and Consumables

Leaving internal components loose inside electronics invites mechanical failure during transport.
  • Eject Physical Discs: Remove all Blu-ray discs, game cartridges, and DVDs from optical drives to prevent them from slipping off the spindle and scratching internal laser lenses during transit.
  • Take Out Batteries: Remove alkaline batteries from remote controls, wireless keyboards, mice, and smart home sensors. Loose batteries can corrode or leak acid during transit under fluctuating environmental temperatures.
  • Extract Consumables: Remove ink cartridges, toner units, and water reservoirs from printers and coffee makers to avoid internal fluid leakage that could short-circuit underlying electrical boards.

Essential Packing Supplies for Electronics

Standard household moving supplies do not provide adequate protection for delicate electronic components. Investing in specialized packaging materials prevents physical abrasion and electrical static damage.
  • Original Manufacturer Packaging: The original product box and custom-molded styrofoam inserts offer the highest level of engineered protection. If you saved these boxes, always use them first.
  • Anti-Static Bubble Wrap: Standard pink anti-static bubble wrap is chemically treated to prevent the buildup of electrostatic discharge, making it essential for bare computer components, graphics cards, motherboards, and bare hard drives.
  • Heavy-Duty Double-Wall Boxes: Standard single-wall moving boxes can crush under the weight of stacked cargo. Double-wall corrugated cartons provide reinforced structural integrity for heavy audio receivers and desktop towers.
  • Microfiber Cloths and Screen Covers: Soft microfiber towels or non-abrasive foam sheets protect delicate flat-panel television glass and monitor surfaces from micro-scratches caused by coarse packing materials.
  • Resealable Plastic Bags: Heavy-duty zip-top bags keep small screws, mounting brackets, remote controls, and associated power supplies grouped together with their parent devices.
  • Heavy-Duty Packing Tape: Wide polypropylene packaging tape creates rigid structural seams along the bottom and top flaps of heavy moving boxes.

Step-by-Step Packing Procedures by Device Category

Different categories of electronic devices require tailored packing strategies based on their physical dimensions, weight distribution, and screen fragility.

Flat-Screen Televisions and Computer Monitors

Modern liquid-crystal display (LCD) and organic light-emitting diode (OLED) screens are exceptionally fragile and must never be laid flat or subjected to direct face pressure.
  • Screen Protection: Cover the entire glass panel with a sheet of non-abrasive foam or a clean microfiber cloth, securing it in place with painter’s tape along the outer plastic bezel.
  • Foam Corner Guards: Slip dense foam corner blocks over all four corners of the television to absorb shock from sudden drops or shifts.
  • Telescoping TV Boxes: Slide the wrapped television into an adjustable heavy-duty telescoping cardboard TV box. Fill all remaining voids with crumpled kraft paper or anti-static bubble wrap so the screen cannot slide inside the container.
  • Upright Orientation: Always store and transport flat-screen televisions vertically on their base edge. Never lay a flat screen down horizontally on its back or face, as road vibrations can crack the internal glass matrix under its own unsupported weight.

Desktop Computer Towers and Workstations

Desktop towers house heavy internal components like discrete graphics cards and massive heatsinks that put mechanical strain on motherboard sockets during bumpy rides.
  • Internal Stabilization: If you have custom-built a powerful PC with a heavy graphics card or large air cooler, remove the graphics card and pack it separately in an anti-static bag, or secure the interior cavity with specialized expanding foam packing packs designed for computers.
  • Exterior Casing Wrap: Wrap the entire chassis in multiple layers of heavy-duty bubble wrap, paying special attention to tempered glass side panels.
  • Base Cushioning: Line the bottom of a heavy-duty box with at least three inches of crumpled packing paper to create a shock-absorbing crumple zone before placing the tower inside.

Audio Equipment, Amplifiers, and Home Theater Receivers

Audio components are often dense and front-heavy due to internal transformers and metallic heat spreaders.
  • Knob and Dial Protection: Place a rigid piece of cardboard over front-facing knobs, dials, and display panels to prevent them from snapping off under lateral pressure.
  • Weight Distribution: Place the heaviest audio units at the very bottom center of double-walled boxes to maintain a low center of gravity.
  • Ventilation Sealing: Cover top ventilation grates with kraft paper to prevent packing peanuts, foam dust, or debris from falling into the internal circuitry.

Laptops, Tablets, and Mobile Handhelds

Portable electronics contain lithium-ion batteries and compact logic boards that require snug, temperature-controlled packing.
  • Sleeve Protection: Place every laptop and tablet into a padded neoprene sleeve before boxing.
  • Central Packing: If packing multiple portable units together, place them vertically like books inside a small, sturdy box lined with thick bubble wrap, ensuring devices do not press against one another directly.

Electronics Moving Preparation and Packing Checklist

Phase Core Objective Key Action Items
Pre-Move (3 to 5 Days Out) Data and Hardware Preservation Back up cloud and physical drives; take photos of cable configurations
Preparation (1 to 2 Days Out) Decontamination and Securing Eject discs; remove ink cartridges; take out alkaline batteries
Wrapping Stage Surface and Static Protection Apply anti-static bubble wrap; secure screen covers; use corner guards
Boxing Stage Shock Absorption and Rigidity Use double-wall boxes; line base with 3 inches of paper; fill empty voids
Loading Stage Environmental Safety Keep screens upright; avoid extreme heat/cold; transport high-value gear in personal car

Loading, Climate Management, and Unpacking Protocols

How electronics are loaded into the moving vehicle and unpacked in your new residence is just as important as how they are wrapped.
  • Avoid Extreme Temperatures: Electronic components, especially lithium batteries and high-definition screens, are vulnerable to severe heat and sub-freezing temperatures. If moving during peak summer or winter, transport your most sensitive items inside the climate-controlled cabin of your personal vehicle.
  • Strategic Stacking: Never place heavy moving cartons on top of boxes labeled as containing fragile electronics. Secure electronics boxes flat on the truck floor or on top of sturdy furniture items where they cannot tip over during sharp turns.
  • Acclimatization Before Powering On: When arriving at your new home during cold or humid weather, unpack your electronics and allow them to rest at room temperature for several hours before plugging them into wall outlets. Powering on a freezing device in a warm room can generate internal condensation, leading to short circuits and permanent electrical failure.

Frequently Asked Questions

Can I use standard pink packing peanuts to pack sensitive computer components?

Standard pink packing peanuts are anti-static and safe from electrostatic discharge, but they tend to shift during transit, allowing heavy equipment to sink to the bottom of the box where it becomes vulnerable to impacts. Dense anti-static bubble wrap, polyethylene foam planks, and heavy crumpled kraft paper provide far better mechanical stability for heavy computer towers and components.

Should I disconnect the stand and wall mount from my flat-screen television before packing?

Yes. Leaving a table stand or wall-mount bracket attached to your flat-screen television adds uneven leverage points that can twist the chassis and crack the glass when the box moves. Completely remove the base or mounting brackets, place the mounting hardware and screws into a labeled plastic bag, and tape that bag securely to the exterior wrap of the television box.

How do I safely pack lithium-ion power banks and rechargeable devices for long moves?

Discharge rechargeable lithium-ion power banks and portable electronics to roughly 50 percent capacity before packing. Storing lithium batteries at full charge or completely depleted during transport increases the risk of thermal stress and battery degradation. Ensure devices are powered completely off rather than left in standby or sleep mode to avoid overheating inside enclosed boxes.

What should I do if I no longer have the original box for my large flat-screen TV?

You can purchase heavy-duty telescoping TV moving boxes from moving supply companies or hardware stores. These corrugated boxes consist of two interlocking cardboard sleeves that adjust to fit screens ranging from 32 to 75 inches. Pair the telescoping box with dense universal foam corner guards and multiple layers of bubble wrap to recreate the protection of original manufacturer packaging.

Is it safe to transport laser printers with toner cartridges installed inside the unit?

No. You should always remove laser toner cartridges and place them into sealed plastic bags before packing the printer. Road vibrations and temperature changes can cause toner hopper seals to fail, releasing micro-fine toner powder throughout the internal mechanical rollers, optical laser mirrors, and motherboard circuits, which often ruins the printer permanently.

How do I protect delicate mechanical hard drives from physical road vibrations during a long move?

Traditional spinning platter hard disk drives are sensitive to mechanical shocks. Wrap individual mechanical drives in at least three inches of anti-static bubble wrap and place them snugly into rigid, padded carrying cases. If possible, transport these drives in your personal vehicle rather than on the moving truck, and avoid subjecting them to sudden drops or hard knocks while handling.

How long should I wait to turn on electronics that were stored in a freezing moving truck?

Allow all electronic items brought in from sub-freezing conditions to acclimate to room temperature for at least two to four hours before plugging them into electrical power. This waiting period ensures that any internal condensation formed by the rapid temperature transition completely evaporates, preventing immediate short circuits when power flows through the boards.
read more
Flooring

Creative Flooring Designs That Make a Strong First Impression

Flooring is often considered the foundation of interior design, yet it frequently receives less creative attention than wall colors, furniture, or lighting fixtures. When guests or prospective buyers step into a home, the floor is one of the very first design elements they register visually and physically. A well-conceived flooring concept sets the tone for the entire residence, establishing architectural intent, texture, depth, and personality.
Moving away from conventional, uniform flooring layouts allows homeowners and designers to convert plain floor planes into compelling design features. By integrating intricate geometric patterns, combining contrasting raw materials, and experimenting with customized finishes, you can craft spaces that captivate visitors from the moment they step across the threshold.

The Art of Geometric Woodwork: Herringbone, Chevron, and Parquetry

Hardwood remains a timeless flooring choice, but standard straight-plank installations can sometimes feel predictable. Laying natural timber in dynamic geometric formations introduces structural energy, historic sophistication, and visual rhythm to foyers, hallways, and central living areas.

Classic Herringbone and Crisp Chevron Patterns

Herringbone and chevron arrangements both use angled planks, yet their construction techniques produce distinct visual effects.
  • Herringbone Installation: Individual rectangular wooden planks are positioned perpendicularly in a staggered, overlapping 90-degree zig-zag. This pattern provides multidirectional stability, highlights organic grain variations, and draws the eye forward down entry corridors.
  • Chevron Precision: Chevron planks feature ends cut at precise 45-degree or 60-degree angles. When aligned edge-to-edge, they create a continuous, razor-sharp V-shaped seam that adds a tailored, contemporary feel reminiscent of classic Parisian townhomes.
  • Scale Variations: Using oversized, extra-wide engineered oak planks creates a modern, open ambiance, whereas narrow, antiqued walnut strips bring an intimate, historic character to formal dining rooms and libraries.

Intricate Parquet Inlays and Medallions

Custom parquetry turns wood flooring into intricate mosaic woodwork. Incorporating parquet medallions or Versailles panels in high-visibility areas like entrance foyers establishes an undeniable focal point. Using subtle tone variations, such as pairing white oak borders with rich walnut field tiles, defines spaces naturally without the need for physical partitions.

Seamless Material Transitions: Mixing Wood, Tile, and Stone

One of the most striking contemporary flooring trends is abandoning straight transitions and thresholds in favor of organic, mixed-material integration. Rather than separating living spaces and wet zones with abrupt metal trim pieces, modern designs allow natural wood planks and decorative tiles to merge fluidly.

The Hexagon-to-Plank Hex-Tile Gradient

Blending hexagonal porcelain or encaustic tiles into standard hardwood planks creates a visually striking transition between high-traffic entryways and living rooms.
  • Organic Interlocking Cuts: Floor layers cut hardwood planks to lock directly around the geometric edges of incoming hexagonal tiles, creating a scattered, dissolving effect across the room boundary.
  • Zone Differentiation: This technique brings durable, waterproof ceramic or natural slate protection to wet entryways and mudrooms while maintaining the warmth of natural wood in adjacent spaces.
  • Contrast Combinations: Pairing deep charcoal or patterned Moroccan encaustic tiles with pale, wire-brushed white oak delivers a bold, eye-catching visual transition.

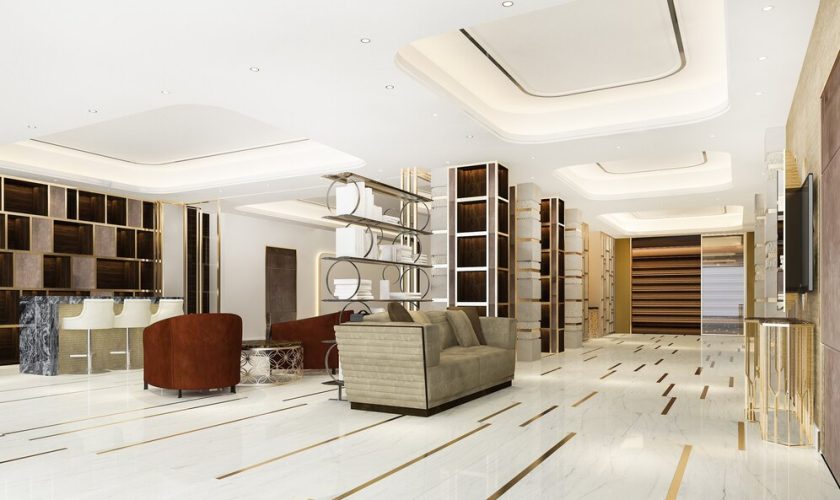
Inlaid Metal Trim and Stone Accents

Incorporating slim brass, bronze, or blackened steel inlays between terrazzo slabs, polished concrete, or hardwood planks introduces subtle architectural luxury. These thin metallic transitions catch natural light, accentuate room boundaries, and highlight deliberate layout divisions.

Statement Tiles: Encaustic, Terrazzo, and Mosaic Expressions

Tile offers unmatched creative freedom through color, shape, pattern, and texture. Installing artistic tile designs in entryways, mudrooms, powder baths, and open kitchens creates an immediate visual impact that sets expectations for the entire home.

Handcrafted Encaustic Cement Tiles

Unlike glazed ceramic tiles where color is applied only to the top layer, encaustic cement tiles feature pigmented mineral patterns pressed deep into the tile body.
  • Artisanal Character: Slight imperfections and matte, chalky textures give cement tiles handmade warmth that synthetic surfaces cannot replicate.
  • Geometric and Botanical Motifs: From bold Spanish and Portuguese stars to delicate floral scrollwork, encaustic patterns transform narrow entryways into lively, welcoming spaces.
  • Rug-Style Inlays: Framing a patterned tile layout with a solid stone or porcelain border mimics the visual appeal of an area rug while retaining the durability and ease of cleaning of hard flooring.

Revitalized Custom Terrazzo

Once a staple of mid-century commercial architecture, terrazzo has returned as a premier residential flooring option. Made by setting chips of marble, quartz, granite, and colored glass into a cementitious or epoxy matrix, poured-in-place or large-format terrazzo tiles offer an exceptionally smooth, customized surface.
  • Custom Aggregate Blends: Homeowners can calibrate chip sizes and color tones, combining jade marble fragments with neutral stone matrices to echo subtle interior color accents.
  • Seamless Continuous Flow: Polished terrazzo delivers an expansive, light-reflective surface that makes small entry vestibules and compact living zones feel open, airy, and bright.

Industrial Minimalism: Polished, Stained, and Exposed Concrete

For contemporary, industrial, or minimalist interiors, concrete flooring offers a sleek, monolithic foundation that shifts attention to clean architectural lines, furniture silhouettes, and incoming natural daylight.
Refining concrete surfaces involves several creative approaches:
  • High-Gloss Diamond Polishing: Grinding the concrete surface with fine diamond abrasives produces a mirror-like finish that bounces ambient light across open-plan living areas.
  • Acid and Water-Based Staining: Acid stains react chemically with the free lime in cured concrete, producing rich, mottled tones reminiscent of natural travertine, leather, or aged slate.
  • Aggregate Exposure Levels: Heavy surface grinding reveals the internal sand and gravel aggregates, delivering an organic, salt-and-pepper or exposed-stone appearance that naturally disguises everyday dust and foot traffic.

Flooring Strategy and Visual Impact Breakdown

Flooring Design Concept Best Suited Areas Primary Visual Impact Maintenance Considerations
Herringbone / Chevron Wood Foyers, long hallways, open living rooms Lengthens sightlines and introduces refined geometry Requires standard hardwood care and humidity management
Hexagon Tile to Wood Gradient Entryways, kitchen-to-living transitions Creates artistic, seamless zone divisions Demands precision cutting and flexible expansion grouting
Encaustic Cement Rug Inlays Vestibules, powder rooms, mudrooms Delivers bold pattern focal points and historic charm Requires periodic penetrative sealing to prevent staining
Poured or Tiled Terrazzo Contemporary foyers, dining areas Bounces natural light and offers custom aggregate color Simple to clean, needs occasional mechanical repolishing
Polished Aggregate Concrete Industrial lofts, open-plan spaces Monolithic, modern, and uninterrupted floor flow Highly durable, needs sealed expansion joints and mopping

Layering Textures and Directional Flow

Creative flooring is not just about choosing bold colors; it involves strategically guiding movement and perception through the home.
Directing plank layouts toward primary architectural features—such as floor-to-ceiling windows, statement fireplaces, or garden vistas—draws the eye through the interior. Similarly, switching plank orientations or introducing decorative borders between adjoining rooms provides subtle spatial cues, making open floor plans feel organized and intentional without adding walls.
Investing in imaginative, high-craftsmanship flooring turns an everyday structural surface into a memorable design statement. By combining rich geometric woodwork, artistic tile transitions, and durable custom aggregates, you ensure your home leaves an unforgettable first impression on anyone who walks through the door.

Frequently Asked Questions

What type of flooring is best for high-traffic entryways in wet climates?

Porcelain tile, natural slate, and polished concrete are optimal for entryways in wet climates because they resist water penetration, mud, road salt, and abrasive grit. If natural wood is preferred, engineered hardwood with a durable aluminum oxide finish or high-quality wood-look porcelain tile provides superior moisture resistance compared to solid wood planks.

How do contractors handle height differences when blending tile and hardwood together?

Achieving a flush, smooth transition between dissimilar materials requires careful subfloor preparation. Contractors often apply self-leveling underlayment or use uncoupling membranes of varying thicknesses beneath the tile. This aligns the finished top surface of the tile perfectly with the height of the adjacent hardwood, eliminating tripping hazards and awkward transition strips.

Can encaustic cement tiles be installed over existing radiant floor heating systems?

Yes. Cement tiles have good thermal mass, allowing them to conduct and retain heat effectively over radiant heating systems. Installers must use a flexible, polymer-modified thin-set mortar and leave adequate perimeter expansion gaps to accommodate natural thermal expansion and contraction during seasonal temperature shifts.

How does the scale of a flooring pattern affect the perceived size of a room?

Large-scale patterns, such as wide-plank chevron or oversized large-format tiles, reduce visual clutter by minimizing visible grout lines and seams, making compact rooms feel larger and more open. Conversely, small, intricate patterns work well as defined focal accents in contained areas like entry vestibules and powder rooms.

Are concrete floors too hard or cold for standard residential living areas?

While concrete is inherently dense, pairing it with in-floor hydronic or electric radiant heating creates an evenly warm, comfortable living surface during cold seasons. Additionally, strategic placement of thick natural-fiber area rugs, wool runners, and upholstered furnishings softens acoustics and adds tactile comfort throughout the home.

How often do natural encaustic cement tiles need to be resealed?

Encaustic cement tiles are porous and lack a vitreous glaze, requiring application of a high-quality penetrative sealer immediately after installation and before grouting. In typical residential entryways and bathrooms, re-applying a breathable penetrative stone sealer every two to three years prevents liquid absorption, oils, and dirt from staining the pigments.

What is the primary difference between solid hardwood and engineered wood for geometric patterns?

Solid hardwood consists of single pieces of milled timber that expand and contract across their width with humidity changes, requiring careful climate control when installed in complex patterns. Engineered hardwood features a real hardwood veneer bonded over cross-laminated plywood layers, offering superior dimensional stability that resists warping and cupping in intricate herringbone or chevron installations.
read more
Kitchen

Kitchen Design Tips That Make Everyday Cooking More Enjoyable

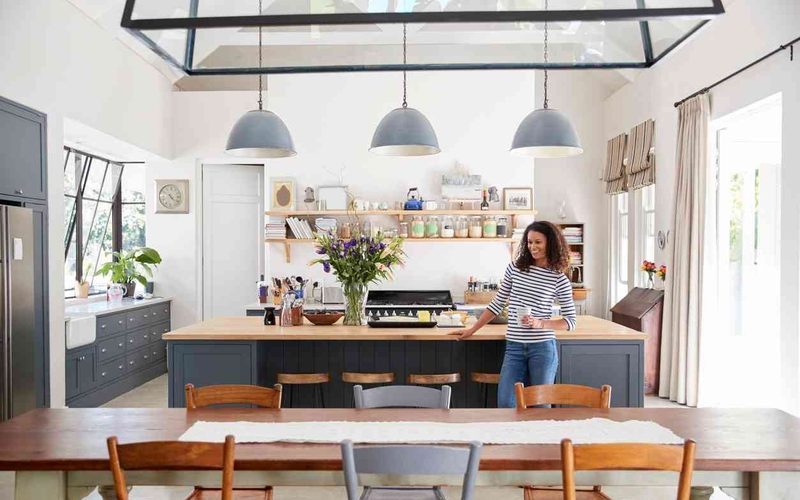
The kitchen is often referred to as the heart of the home, but for anyone who cooks regularly, it is first and foremost a working laboratory. When a kitchen is poorly planned, preparing a simple weeknight meal can feel like an obstacle course of crossed paths, cluttered counters, and inaccessible tools. Conversely, a kitchen designed with culinary workflow in mind turns everyday meal preparation into a relaxing, creative experience.
Creating an enjoyable culinary environment requires more than choosing attractive tile or on-trend cabinet colors. True kitchen efficiency stems from ergonomic planning, logical zone organization, specialized task lighting, and thoughtful storage solutions. When every utensil, appliance, and prep surface is positioned with intention, the entire cooking process becomes seamless, safe, and genuinely satisfying.

Modernizing the Working Triangle into Functional Work Zones

For decades, the classic kitchen work triangle—connecting the sink, refrigerator, and range—served as the gold standard for layout design. While the triangle remains a helpful guideline, modern households often have multiple people using the kitchen at once for cooking, baking, entertaining, or cleaning. Expanding the classic triangle into dedicated functional work zones provides superior operational flow.

The Prep Zone

The food preparation zone is where cooks spend the vast majority of their time. This area requires uninterrupted counter space, ideally positioned between the water source and the primary cooking surface.
  • Continuous Countertop Space: Aim for at least thirty-six to forty-eight inches of continuous, unobstructed countertop specifically for chopping, mixing, and seasoning.
  • Integrated Waste Solutions: Install a pull-out double trash and recycling cabinet directly beneath or adjacent to the prep station. Incorporating a cutting board with a direct countertop cutout above the trash allows food scraps to be swept away instantly.
  • Knife and Board Proximity: Store chef knives in a dedicated wooden drawer insert or on a wall-mounted magnetic strip right at the prep station, accompanied by a vertical slot for cutting boards.

The Cooking Zone

The cooking zone centers around the cooktop, range, and wall ovens. Efficiency in this area minimizes the steps needed to transfer prepared ingredients into hot cookware.
  • Cookware Storage: Utilize deep drawers beneath the cooktop rather than traditional lower cabinets. Pull-out drawers allow full overhead visibility of heavy pots, cast-iron skillets, and saucepans without bending or reaching into dark corners.
  • Spice and Seasoning Pull-Outs: Install a narrow, four- to six-inch spice pull-out cabinet directly next to the range. Keeping salt, oils, vinegars, and frequently used dry spices within arm reach prevents sauces from burning while you search through a distant pantry.
  • Heat-Resistant Landing Spots: Ensure there is at least twelve to fifteen inches of heat-resistant countertop space on either side of the cooktop to safely set down hot pans and baking sheets straight from the oven.

The Cleaning and Scullery Zone

Separating the cleanup zone from the food preparation area prevents dirty dishes from encroaching on clean workspaces.
  • Undermount Sink Placement: Position the main sink near the dishwasher to create a smooth rinse-and-load workflow. An undermount sink allows crumbs and liquids to be wiped straight into the basin with a single sponge pass.
  • Dedicated Dish Storage: Store daily dinnerware, glasses, and silverware in upper cabinets or drawers located immediately adjacent to the dishwasher, making the unloading process fast and effortless.

Designing Ergonomic Storage That Eliminates Frustration

Cooking fatigue is often caused by unnecessary bending, stretching, and rummaging through overcrowded cabinets. Ergonomically sound storage systems bring tools directly to the cook, reducing physical strain.

Wide Base Drawers over Lower Cabinets

Traditional lower cabinets with fixed shelving waste substantial vertical space and force cooks to kneel down to reach items stored in the back. Replacing standard lower doors with wide, full-extension drawers revolutionizes kitchen ergonomics.
  • Heavy-Duty Undermount Slides: Soft-close, high-capacity drawer slides support heavy stacks of ceramic plates, enameled Dutch ovens, and small kitchen appliances effortlessly.
  • Adjustable Peg Systems: Deep drawers equipped with wooden pegboards allow you to customize dish storage, keeping bowls and plates securely separated and easy to lift out from waist height.

Specialized Appliance Garages

Small countertop appliances like stand mixers, blenders, and food processors can quickly overwhelm prep surfaces. An appliance garage keeps these heavy tools plugged in and accessible behind pocket doors, roll-up tambour doors, or bi-fold panels.
When you need to puree a soup or knead dough, the machine slides forward on a pull-out shelf. Once finished, the appliance glides back, and the doors close, leaving the countertops clean and clear.

Mastering Layered Kitchen Lighting

Dim or improperly placed lighting can make everyday cooking hazardous and visually exhausting. A single central ceiling fixture casts shadows directly over your hands when you lean forward over the countertop. A culinary-focused kitchen relies on three distinct layers of illumination.
  • Under-Cabinet Task Lighting: Position continuous warm-white LED light channels along the underside of all upper cabinets. This casts bright, shadow-free illumination directly onto your prep surfaces, cutting boards, and recipe books.
  • Overhead Recessed Lighting: Space recessed ceiling lights strategically along the perimeter of the room, aligning the beams with the edge of the countertops rather than the middle of the walkways. This prevents the cook from blocking the light source.
  • Accent and Ambient Fixtures: Decorative pendant lights over a central kitchen island and toe-kick lighting beneath base cabinets add warmth, depth, and character, making the room an inviting gathering space for family and guests.

Selecting Resilient, Low-Maintenance Countertop Materials

A surface that stains easily or requires delicate maintenance creates ongoing stress for the home cook. Choosing durable, non-porous surfaces ensures you spend your time enjoying meal preparation rather than worrying about citrus etching or oil absorption.
  • Engineered Quartz: Made from crushed natural quartz bound with polymer resins, engineered quartz is non-porous, scratch-resistant, and never requires periodic chemical sealing. It withstands acidic spills like lemon juice, tomato paste, and red wine with ease.
  • Sintered Stone and Porcelain Slabs: Fabricated under extreme heat and pressure, large-format porcelain slabs are entirely heatproof, UV-resistant, and impervious to scratches. You can place hot pots directly onto the surface without risking thermal shock or scorching.
  • Honed vs. Polished Finishes: While high-gloss polished finishes reflect light beautifully, honed (matte) or leathered textures do a superior job of disguising fingerprints, water spots, and micro-scratches caused by daily use.

Workflow and Kitchen Efficiency Matrix

Kitchen Zone Key Functional Elements Ideal Location Relative to Room Primary Cooking Benefit
Primary Prep Deep cutting surface, knife storage, compost drop Between sink and cooktop Streamlines ingredient staging and waste cleanup
Cooking Core Induction or gas burners, oven, spice pull-out Central wall or dedicated island run Eliminates steps when managing active cooking heat
Wet Scullery Deep single-basin sink, high-arc faucet, dishwasher Along an exterior wall or island side Keeps soiled cookware out of food preparation zones
Cold Storage Refrigerator, freezer, walk-in pantry Entry perimeter of the kitchen Allows family access to drinks without crossing cook path
Appliance Hub Coffee maker, toaster, stand mixer garage Out of primary cooking flow Prevents morning congestion in primary work zones

Incorporating Thoughtful Culinary Details

Small, purposeful design touches can transform standard kitchen routines into professional-grade experiences.
  • Pot Filler Faucet: Installing a swing-arm pot filler directly on the backsplash above the cooktop eliminates the physical strain of carrying heavy, water-filled stockpots across the kitchen floor.
  • Induction Cooktop Technology: Modern induction cooktops offer pinpoint temperature responsiveness, boiling water twice as fast as gas while keeping the glass surrounding the burner cool to the touch. Because the surface is completely flat, wiping up boil-overs takes mere seconds.
  • Deep Single-Bowl Sinks: Swap traditional double-bowl split sinks for an extra-deep, thirty- to thirty-six-inch single basin with an offset drain. A large single bowl easily accommodates oversized sheet pans, roasting dishes, and large soup pots that cannot fit into standard divided sinks.
An efficient kitchen is not defined by its square footage, but by how thoughtfully every inch is utilized. By organizing your layout into distinct functional zones, integrating ergonomic drawers, layering crisp task lighting, and choosing resilient work surfaces, you create a kitchen that removes friction from everyday routines and makes every cooking session a pleasure.

Frequently Asked Questions

What is the ideal distance between a kitchen island and surrounding countertops?

The ideal aisle width in a functional kitchen is forty-two inches for a single cook and forty-eight inches for households where multiple people cook together. Maintaining this clearance allows oven doors, dishwashers, and wide cabinet drawers to open fully without blocking foot traffic or bumping into opposing cabinetry.

How high should upper kitchen cabinets be installed above the countertop?

The standard height for mounting upper wall cabinets is eighteen inches above the finished countertop. This spacing provides ample vertical clearance for countertop appliances like blenders, stand mixers, and electric kettles while keeping items stored on the first two cabinet shelves within normal reach for most adults.

Are open shelves practical for everyday home cooks?

Open shelving works exceptionally well when reserved for items used on a daily basis, such as everyday dinner plates, coffee mugs, and water glasses, as high turnover prevents dust accumulation. However, open shelves located directly next to the cooktop should be avoided, as airborne cooking grease and steam will settle on exposed items, requiring frequent washing.

What type of range hood ventilation is best for frequent stovetop cooking?

A ducted range hood that vents exhaust air directly to the outside of the home is vastly superior to a ductless, recirculating model. Aim for a ventilation hood that provides at least three hundred to six hundred cubic feet per minute (CFM) of airflow, ensuring it captures airborne grease, steam, cooking odors, and combustion gases before they disperse into the home.

Why are drawers preferred over pull-out rollout trays behind cabinet doors?

Full-extension drawers require only a single physical motion to open and view the entire contents. Pull-out rollout trays hidden behind hinged cabinet doors require two steps: first swinging the doors fully open, then pulling out the internal tray. If the doors are not opened wide enough, rollout trays can scrape and damage the interior wood of the cabinet doors over time.

How do workstation sinks enhance food preparation?

Workstation sinks feature integrated interior ledges that hold custom-fitted accessories like sliding cutting boards, colanders, drying racks, and prep bowls directly over the sink basin. This allows cooks to wash, chop, and rinse vegetables directly over the drain, containing wet messes and saving valuable countertop space in compact kitchens.

What is the most functional placement for a microwave in a modern kitchen?

The most functional and ergonomic placements for a microwave are inside a built-in lower base cabinet, incorporated into a dedicated microwave drawer beneath the counter, or set at eye level within a tall wall-oven stack. Positioning a heavy, hot microwave high above a range hood creates reaching hazards when lifting boiling liquids and should be avoided whenever possible.
read more
Roofing

How Proper Roof Drainage Prevents Structural Damage

A roof does far more than shelter a building from the sun and wind. Its most vital engineering role is water management. During a heavy downpour, a standard residential or commercial roof collects thousands of gallons of water in a matter of minutes. Without a deliberate, efficient pathway to guide that volume away from the structure, water will inevitably find vulnerabilities, pool in low points, and inflict extensive structural damage.
Water is persistent and destructive. It seeps into minute cracks, softens load-bearing timber, corrodes steel fasteners, degrades foundation masonry, and fosters hazardous mold colonies. Investing attention and resources into an effective roof drainage network is not simply an exterior aesthetic choice; it is a fundamental requirement for maintaining the structural integrity and long-term market value of any building.

The Anatomy of an Efficient Roof Drainage System

A resilient roof drainage system is an integrated network designed to capture, direct, and discharge water safely away from a building’s footprint. The primary components vary depending on whether the structure features a pitched roof or a low-slope commercial roof, but the core mechanics remain consistent.

Core Drainage Components for Pitched Roofs

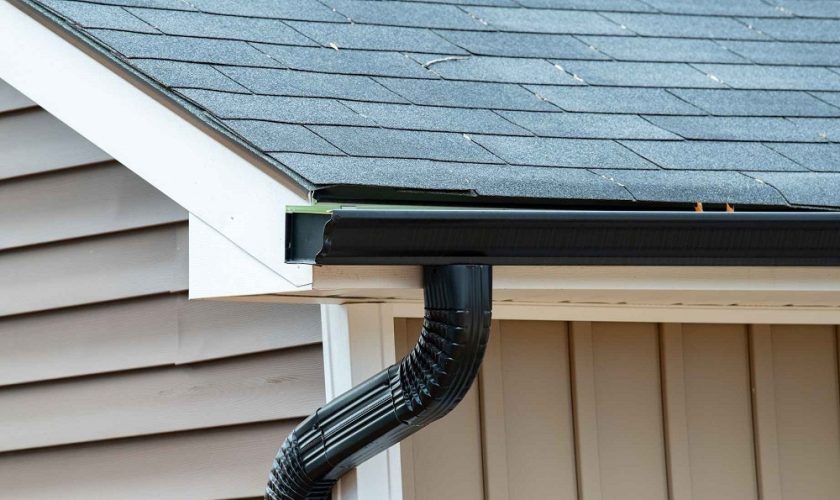
  • Gutters and Eaves Troughs: Open horizontal channels installed along the lower roof perimeter designed to catch runoff flowing down the roof slope.
  • Downspouts and Leaders: Vertical piping that conveys collected water from the roofline down to ground level.
  • Elbows, Offsets, and Extensions: Curved pipe segments that redirect flow around architectural trim and discharge water at least five to ten feet away from the foundation wall.
  • Gutter Aprons and Drip Edges: Metal flashing strips installed beneath shingles to prevent surface tension from pulling water backward onto the wooden fascia board and soffit.

Core Drainage Components for Low-Slope and Flat Roofs

  • Scuppers: Openings cut through exterior parapet walls that allow excess water to discharge directly into exterior conductor heads or downspouts.
  • Internal Drains: Depressed drain bowls installed within the roof membrane that channel water into internal drainage pipes running through the interior building envelope.
  • Secondary Emergency Overflow Drains: Auxiliary drain openings set slightly higher than primary drains to provide backup drainage if the primary system clogs during extreme storms.
  • Tapered Roof Insulation: Engineered insulation panels sloped intentionally toward drains to eliminate standing water pockets.

How Inadequate Drainage Damages Roof Decks and Trusses

When water fails to leave a roof quickly, the upper framing of the building suffers first. Continuous exposure to moisture degrades roofing materials from the outside in.

Ponding Water and Excessive Dead Load

On flat or low-slope roofs, poor slope design or blocked drains cause ponding water, defined as standing water that remains on a roof surface for forty-eight hours or longer after precipitation stops. Water weighs approximately 8.34 pounds per gallon, or about 62.4 pounds per cubic foot. A ponding area just one inch deep across a modest twenty-by-twenty-foot roof zone adds over two thousand pounds of dead weight.
This concentrated weight places severe stress on underlying rafters, joists, and structural trusses. Over time, the framing sags beneath the load, creating a deeper depression that captures even more water during subsequent storms. In extreme scenarios, this escalating cycle leads to catastrophic roof deck failure or total structural collapse.

Timber Rot, Fascia Decay, and Delamination

On pitched roofs, blocked or improperly sloped gutters cause water to back up beneath the bottom edges of shingles. Once moisture bypasses the protective water-resistive underlayment, it contacts the plywood or oriented strand board (OSB) roof sheathing.
  • Fungal Wood Decay: Prolonged dampness allows wood-destroying fungi to thrive, causing dry rot and wet rot that weakens the cellular structure of rafters and trusses.
  • Plywood Delamination: Moisture dissolves the resins bonding composite roof boards, causing them to swell, blister, and lose their load-bearing capacity.
  • Fascia and Soffit Rot: Water overflowing the back lip of a gutter saturates the wooden fascia board, causing gutter mounting brackets to pull loose and detach from the building.

Preventing Moisture Intrusion into Exterior Walls and Siding

When roof drainage fails, the building envelope bears the brunt of the runoff. Overflowing gutters act like a continuous waterfall sheeting down exterior wall surfaces.
  • Degradation of Exterior Siding: Continuous exposure to cascading water rots wooden clapboards, stains vinyl siding, causes stucco to crack and blister, and dissolves the mortar joints in brick veneer.
  • Insulation Saturation: Moisture penetrating exterior wall cavities saturates fiberglass batt and cellulose insulation. Wet insulation loses its thermal resistance, drives up heating and cooling expenses, and creates an ideal breeding ground for hidden mold inside living spaces.
  • Interior Wall and Ceiling Leaks: Once water navigates past the building wrap, it migrates horizontally along wall studs and ceiling joists, manifesting as bubbling paint, crumbling drywall, stained ceiling tiles, and warped hardwood floors.

Protecting Foundation Stability and Subterranean Structures

The most expensive structural damage caused by poor roof drainage occurs at ground level. A roof drainage system that terminates water right next to the foundation wall is just as dangerous as having no gutters at all.

Soil Saturation and Hydrostatic Pressure

Discharging hundreds of gallons of roof runoff next to basement walls saturates the backfill soil surrounding the foundation. As soil absorbs water, it expands and exerts tremendous lateral force, known as hydrostatic pressure, against foundation walls.
  • Wall Bowing and Structural Cracks: Hydrostatic pressure forces concrete block walls to bow inward and causes vertical, stair-step, and horizontal cracks in poured concrete foundations.
  • Basement Flooding: Water penetrates hairline fractures and cold joints in the foundation, pooling in basements and crawlspaces and damaging mechanical systems, furnaces, and stored goods.

Soil Erosion and Differential Settlement

Water pooling around the base of a building alters the load-bearing capacity of the underlying soil.
  • Differential Settlement: If one side of a house receives heavy, unmanaged roof runoff while the other remains dry, the wet soil softens and compresses under the building’s weight. The structure settles unevenly, causing foundation footing cracks, sloping interior floors, sticking doors, and sheared plumbing pipes.
  • Soil Erosion: Concentrated streams of uncontrolled downspout water scour away topsoil, exposing foundation footings to freeze-thaw cycles and causing severe ground erosion around support piers.

Roof Drainage Vulnerabilities and Structural Consequences

Drainage Failure Point Direct Physical Consequence Long-Term Structural Damage
Clogged Roof Gutters Water overflows behind fascia and over front lip Fascia board rot, detached gutters, siding decay
Flat Roof Ponding Water Massive dead load accumulation on roof deck Sagging rafters, membrane degradation, roof collapse
Missing Drip Edge Flashing Capillary action draws water beneath roof edge Sheathing rot, mold growth, decayed rafter tails
Short Downspout Discharge Runoff pools within 2 feet of foundation walls Hydrostatic pressure, foundation cracks, basement flooding
Blocked Scupper Openings Water backs up across low-slope roof planes Interior ceiling leaks, insulation failure, joist fatigue
Failed Flashing Around Drains Moisture penetrates sub-membrane layers Delamination of insulation boards, deck corrosion

Essential Maintenance Practices for Reliable Roof Drainage

Maintaining a reliable drainage network requires consistent seasonal oversight and deliberate inspections.
  • Perform Semi-Annual Cleanings: Clear leaves, twigs, pine needles, and roofing granules from all gutters, downspouts, and flat roof strainer baskets every spring and late autumn.
  • Maintain Proper Gutter Slope: Ensure gutters maintain a steady downward pitch of at least one-quarter inch for every ten feet of horizontal run toward the downspout to prevent stagnant pooling.
  • Extend Downspout Outlets: Install rigid metal or PVC downspout extensions that discharge water a minimum of five to ten feet away from the foundation, routing flow toward natural yard swales or underground French drains.
  • Install Gutter Guards in Wooded Zones: Micro-mesh gutter screens keep airborne debris out of the drainage channel while allowing high-volume rain to enter unobstructed.
  • Inspect Drainage Flashing Annually: Check sealants, counter-flashing, and boots around internal drain bowls, scuppers, and valleys to address cracks or separations before moisture reaches the sub-deck.
A functional roof drainage system is an indispensable defense for the entire building. By capturing rainwater at the roofline and safely escorting it far beyond the foundation perimeter, homeowners and property managers eliminate the primary drivers of rot, soil destabilization, and structural deterioration.

Frequently Asked Questions

How far should downspouts extend away from a house foundation?

Downspouts should discharge water at least five to ten feet away from the exterior foundation wall. In areas with expansive clay soils or steep downward grading toward the house, extending downspouts even farther or connecting them directly into buried solid PVC drain lines that empty into a municipal storm drain or dry well is recommended.

What is the primary difference between a primary and a secondary roof drain on a flat roof?

A primary roof drain sits flush with the finished roof membrane and handles routine rainfall runoff daily. A secondary emergency overflow drain is installed with its inlet elevated two to four inches above the primary drain. If the primary drain clogs during a storm, the secondary drain activates to prevent water from accumulating to structural failure thresholds.

Can overflowing gutters cause damage to a home during winter freezes?

Yes. During winter, clogged gutters fill with trapped water that freezes into solid ice. This ice expands, weighs down the gutter system, and promotes ice dam formation. Ice dams force melting snow to back up beneath the shingles, leading to severe winter attic leaks, wet insulation, and ceiling damage.

How do I know if my gutters are undersized for my roof area?

If water routinely cascades over the front edges of clean gutters during moderate-to-heavy rains, the system is likely undersized. Gutters must be sized based on total roof square footage, roof pitch, and local maximum rainfall intensity. Upgrading from standard five-inch K-style gutters to six-inch gutters nearly doubles the water carrying capacity.

What is a splash block, and is it sufficient on its own?

A splash block is a sloped concrete or plastic tray placed directly beneath a downspout elbow to prevent soil erosion at the discharge point. While splash blocks prevent ground gouging, they are often too short (two to three feet) to move water safely beyond the critical foundation backfill zone, making rigid pipe extensions a safer choice.

Why does improper roof drainage cause doors and windows to stick inside the house?

When roof water saturates the soil beneath one section of a foundation, that part of the house settles faster than surrounding areas. This uneven settlement twists the structural wall framing, causing rectangular door and window openings to become out of square, which makes sashes and doors bind against their jambs.

How does roof pitch influence the speed and volume of water runoff?

A steeper roof pitch accelerates the speed of water runoff. While steep slopes shed water rapidly and prevent ponding, the high velocity sends water into gutters with significant momentum, requiring wider gutter troughs, well-placed diverters in roof valleys, and adequately spaced downspouts to capture the flow without overshooting the eaves.
read more
Furniture

The Role of Furniture in Interior Design Success

Interior design is far more than selecting a color palette for the walls or hanging art at eye level. At its core, interior design is the art and science of shaping human experience within a built environment. While architectural elements establish the physical boundaries of a room, furniture brings the space to life. It bridges the gap between empty structural volume and practical human habitation.
The furniture chosen for a residential or commercial setting dictates how people navigate the floor plan, how comfortable they feel, and what emotional tone the space communicates. Whether an interior achieves long-term aesthetic and functional success relies almost entirely on the thoughtful selection, placement, and proportions of its furnishings. Understanding the core roles that furniture plays allows homeowners, architects, and designers to create interiors that are visually captivating, practical, and enduring.

Defining Space and Spatial Flow

In contemporary architecture, open-concept layouts have largely replaced compartmentalized rooms. While open plans provide an airy, light-filled atmosphere, they also present a unique challenge: without interior walls, rooms can quickly feel vast, undefined, and chaotic. Furniture serves as the primary tool to carve order out of these open expanses.
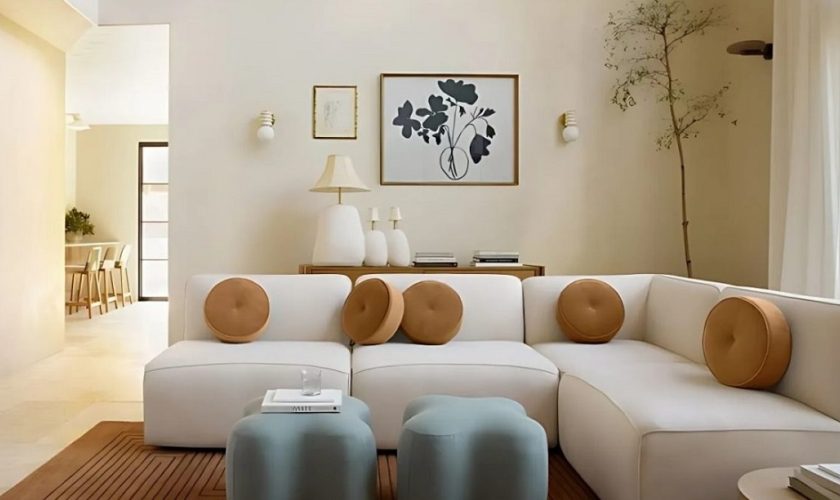
  • Zoning Functional Areas: Large pieces such as sectional sofas, dining sets, and area rugs act as visual anchors. A sectional placed with its back to an open kitchen instantly creates a distinct living room zone without closing off sightlines or blocking natural light.
  • Directing Circulation Pathways: Clear movement throughout a room requires thoughtful furniture placement. Leaving thirty-six to forty-eight inches of clearance along main walking paths prevents traffic bottlenecks, ensuring that moving between rooms feels effortless and intuitive.
  • Establishing Sightlines: Low-profile furniture items, such as credenzas, armless accent chairs, and bench seating, define spatial limits while preserving visual connections between adjoining zones.
When furniture is positioned with intention, the eye moves smoothly through the environment. A well-organized room communicates purpose immediately, giving occupants a clear sense of orientation and ease.

Balancing Scale, Proportion, and Visual Weight

One of the most common mistakes in interior decorating is misjudging the scale and visual weight of furniture relative to the room dimensions. An oversized couch can make a compact living room feel claustrophobic, while delicate, small-scale chairs can disappear in a room with double-height ceilings.
Achieving structural harmony requires balancing physical dimensions with visual perception:
  • Vertical Clearance and Ceiling Height: Rooms with high ceilings benefit from taller furniture silhouettes, such as high-back wing chairs, tall shelving units, and substantial headboards. Low ceilings, by contrast, feel taller when paired with horizontal, low-slung furnishings that leave ample vertical wall space open.
  • Visual Mass versus Footprint: Visual weight describes how heavy an object appears to the human eye. A dark wood cabinet with a solid base resting flat on the floor carries substantial visual mass. A glass-topped coffee table with slender brass legs possesses a light visual footprint, making it ideal for smaller areas where open space must be maintained.
  • Proportional Groupings: Pairing a massive, deep sofa with a tiny, fragile cocktail table creates visual tension. Every piece in a furniture grouping should relate proportionally to its neighboring elements to create a cohesive whole.

Anchoring the Design Theme and Aesthetic Identity

Furniture is the most direct visual expression of an interior design style. While flooring and paint establish the background canvas, furniture pieces express the specific character, period, and personality of the space.
Carefully selected furnishings reinforce the overarching concept through material, silhouette, and finish:
  • Mid-Century Modern: Emphasizes organic curves, tapered wooden legs, rich walnut finishes, and minimalist geometric forms.
  • Industrial Contemporary: Uses raw structural materials like exposed steel frames, distressed leather upholstery, reclaimed ironwood, and utilitarian hardware.
  • Scandinavian Minimalism: Prioritizes light-toned timbers, clean linear silhouettes, neutral woven textiles, and functional simplicity.
  • Traditional Elegance: Incorporates tufted upholstery, ornate wood carvings, rich velvets, antique brass detailing, and classic symmetry.
Mixing furniture styles can also produce exceptional results when done with purpose. Combining a modern marble dining table with vintage bentwood chairs creates an eclectic, layered interior that feels curated over time rather than purchased directly from a showroom catalog.

Supporting Ergonomics, Comfort, and Human Well-Being

A room can look stunning in a photograph, but if the seating causes back discomfort or the dining table is set at an awkward height, the design has fundamentally failed. Successful interior design always prioritizes the physical comfort and physical health of the occupants.
Ergonomics focuses on designing products that accommodate human posture and movement:
  • Seat Depth and Cushion Density: Standard seat depth ranges from twenty to twenty-four inches, supporting natural knee flexion. Layered high-resiliency foam combined with down feather wraps provides long-lasting lumbar support without sagging over time.
  • Table and Surface Heights: A dining table must maintain an industry-standard height of twenty-eight to thirty inches, paired with dining chairs that provide ten to twelve inches of clearance between the seat and the underside of the table apron.
  • Workplace Ergonomics: In home offices, adjustable desk chairs with active lumbar support, adjustable armrests, and sit-stand desks prevent chronic fatigue and repetitive strain injuries during extended work sessions.
When furniture supports proper biomechanics, occupants feel rested, relaxed, and productive. The space transitions from a purely visual showcase into an inviting haven.

Introducing Color, Texture, and Material Variety

Furniture is a versatile medium for introducing tactile and visual variety into an interior. A room dominated by smooth, flat drywall surfaces can feel sterile and uninviting. Layering different furniture materials and textures creates depth, warmth, and visual interest.
  • Tactile Upholstery: Combining diverse upholstery fabrics—such as smooth top-grain leather, textured bouclé, heavy linen, and soft velvet—engages the sense of touch and enriches the sensory environment.
  • Material Contrast: Placing smooth stone surfaces next to warm natural wood and polished metal accents creates contrast that keeps neutral color palettes dynamic and engaging.
  • Focal Accent Pieces: An accent chair upholstered in a rich jewel tone or a patterned fabric can serve as the centerpiece of an otherwise understated room, drawing attention and tying secondary decorative accents together.

Furniture Functionality and Design Impact Matrix

Furniture Element Primary Spatial Role Critical Design Metric Core Impact on Interior Success
Sectional Sofa Zones open layouts and anchors living spaces Room footprint and seat depth Determines room orientation and social gathering flow
Dining Suite Establishes formal or casual hospitality zones Table clearance and chair height Sets the tone for social interaction and family dining
Accent Seating Balances visual weight and adds focal points Silhouette scale and fabric texture Injects personality, color contrast, and visual energy
Storage Credenza Conceals daily clutter and creates horizontal display Depth clearance and internal storage Preserves clean visual lines and organization
Coffee / Side Tables Serves active seating and holds ambient lighting Height relative to sofa arms Delivers practical daily convenience and utility

Maximizing Utility in Compact Living Spaces

As urbanization continues to drive the demand for compact apartments and townhomes, multifunctional furniture has become an essential aspect of smart interior design. Choosing pieces that serve multiple purposes allows small floor plans to remain functional and clutter-free without sacrificing style.
  • Storage Ottomans and Benches: Provide comfortable seating while offering hidden internal compartments for storing blankets, board games, or seasonal items.
  • Extendable Dining Tables: Feature integrated drop-leaves or self-storing extensions, transitioning easily from a compact two-person breakfast table to an eight-person holiday setup.
  • Modular Seating Systems: Allow sections to be disconnected and rearranged to accommodate different hosting scenarios, adapting on demand to changing social needs.
Furniture is not merely an accessory added at the end of a construction project. It is the functional heart of interior design. By shaping spatial flow, balancing visual scale, expressing aesthetic identity, and supporting human comfort, furniture transforms architecture into a warm, usable, and welcoming home.

Frequently Asked Questions

What is the ideal distance between a coffee table and a sofa?

The standard recommended clearance between the front edge of a sofa cushion and the edge of a coffee table is fourteen to eighteen inches. This distance provides ample legroom for sitting down and standing up comfortably while keeping drinks, books, and remotes within easy arm reach without straining.

How should area rugs be sized in relation to living room furniture?

An area rug should be large enough to anchor the main seating group. In ideal configurations, all four legs of major seating pieces rest entirely on the rug. If space is constrained, the front legs of the sofa and accent chairs should sit at least six to eight inches onto the rug. Avoid small floating rugs that sit completely disconnected in the center of the room.

How do I choose between custom furniture and mass-produced pieces?

Custom furniture is ideal when dealing with non-standard room dimensions, specific architectural niches, or unique fabric requirements that standard retail sizes cannot accommodate. Mass-produced furniture offers faster lead times and lower upfront costs. Many designers recommend investing in custom, high-durability core pieces (like the primary sofa) while using quality ready-made pieces for accent tables and accessories.

What is the standard height for dining chairs relative to the table?

A standard dining chair features a seat height of eighteen to nineteen inches from the floor, designed to pair with standard dining tables measuring twenty-eight to thirty inches in height. This arrangement preserves a comfortable ten to twelve inches of vertical clearance between the seat and the underside of the tabletop for leg movement.

How can furniture choices improve room acoustics?

Upholstered furniture, plush fabrics, high-density foam cushions, and natural wood pieces absorb sound waves effectively, reducing harsh echoes and reverberation. Incorporating upholstered dining chairs, fabric-wrapped headboards, and thick rugs over hard surfaces helps create a quiet, acoustically balanced environment.

What should I consider when placing furniture near direct sunlight?

Direct ultraviolet light can fade natural timber finishes, cause top-grain leather to dry and crack, and weaken delicate upholstery fibers like silk or linen over time. When placing furniture near large, unshaded windows, choose performance textiles treated with UV inhibitors, apply UV-filtering films to window glass, or position solid wood pieces outside the path of direct sun exposure.

Why is negative space important when arranging furniture?

Negative space refers to the open, unoccupied areas surrounding furniture. Leaving adequate negative space prevents sensory overload, lets statement furniture pieces stand out, and ensures a clean, uncluttered visual rhythm that makes any interior feel calm, balanced, and open.
read more
Decor Tips

Easy Weekend Decor Projects for Instant Home Updates

Refreshing your living environment does not require months of planning, noisy structural renovations, or an exorbitant budget. Over time, even the most thoughtfully curated spaces can begin to feel uninspired. Everyday routines cause rooms to settle into visual stagnation, but small, focused adjustments can dramatically alter how a home looks and feels.
A single weekend offers ample time to complete high-impact interior projects that instantly modernize your surroundings. By targeting strategic focal points such as lighting, accent walls, architectural details, and hardware, you can inject new personality and warmth into your home before Monday morning arrives.

Transform a Room with an Express Accent Wall

Paint remains the fastest, most economical tool for interior transformation. While repainting an entire living area can become an exhausting multi-day commitment, focusing on a single accent wall delivers maximum visual payoff with minimal effort.
An accent wall anchors the room, draws the eye toward architectural highlights, and introduces depth to neutral palettes.
  • Moody Saturated Hues: Deep jewel tones like navy blue, forest green, charcoal slate, or terracotta create an intimate, sophisticated ambiance in bedrooms, dining areas, and living rooms.
  • Textured Wallpaper Applications: Modern peel-and-stick wallpapers offer temporary, mess-free installation. Botanical prints, geometric patterns, or faux linen textures add rich physical depth without damaging the underlying drywall.
  • Wood Slat Paneling: Applying lightweight prefabricated wood acoustic slats to a focal wall provides Scandinavian warmth, improves room acoustics, and introduces organic linear symmetry.
Preparation is the secret to a professional finish. Spend Saturday morning cleaning the target surface, applying painter’s tape along baseboards and ceilings, and filling nail holes with spackle. By Saturday afternoon, you can roll two coats of paint or install adhesive wallpaper panels, leaving Sunday for styling and furniture placement.

Upgrade Cabinet Hardware and Interior Door Handles

Builders often install generic, low-cost hardware that fades into the background. Swapping builder-grade knobs, pulls, and hinges for modern designer hardware is an approachable DIY upgrade that immediately elevates kitchens, bathrooms, and interior doors.
This simple replacement can modernize decades-old cabinetry without the mess of sanding or repainting cabinet faces.
  • Finish Selection: Choose cohesive finishes across the space, such as matte black, brushed brass, satin nickel, or oil-rubbed bronze.
  • Knob and Pull Proportions: Upgrade standard round knobs to elongated bar pulls, textured knurled handles, or oversized cup pulls to give cabinets a custom, bespoke feel.
  • Standard Measurements: Measure the center-to-center hole spacing on existing cabinet doors before shopping to ensure new pulls slide into pre-drilled holes without the need for additional drilling or filling.
Equipped with a basic handheld screwdriver or a low-torque cordless drill, you can update an entire kitchen and two bathrooms in less than three hours.

Layer Ambient and Task Lighting

Lighting dictates the mood, tone, and perceived size of any interior. Many homes suffer from flat overhead lighting that washes out textures and casts unflattering shadows. Creating a warm, inviting atmosphere requires layering light across multiple heights.
A weekend lighting refresh involves replacing outdated fixtures and introducing dedicated accent light sources throughout your living spaces.
  • Swap Flush-Mount Fixtures: Replace dated glass dome lights in hallways, entryways, and bedrooms with sculptural semi-flush mounts, woven rattan pendants, or matte metal drum fixtures.
  • Incorporate Plug-In Wall Sconces: Hardwiring electrical boxes is time-consuming, but plug-in sconces featuring brass arms, fabric shades, or exposed filament bulbs mount directly to drywall anchors. Hide dangling cords inside paintable wire raceways for a clean, built-in appearance.
  • Under-Cabinet and Toe-Kick LED Strips: Apply peel-and-stick, warm-white LED light strips beneath upper kitchen cabinets and bathroom vanities to create functional task lighting and soft nighttime pathways.
  • Calibrate Bulb Temperatures: Replace mismatched, cool-white fluorescent bulbs with uniform warm-white LED bulbs rated between 2700K and 3000K to instantly soften room aesthetics.

Create a Curated Gallery Wall

Bare, expansive drywall can make a living room or hallway feel hollow and unfinished. Designing and assembling a curated gallery wall fills vertical space, introduces color, and showcases personal character.
A successful gallery wall balances structure with visual intrigue.
  • Grid Layouts: Use identical frames with wide white matting arranged in a strict geometric grid (such as a two-by-three or three-by-three layout). This approach looks balanced and works exceptionally well with architectural sketches, black-and-white family portraits, or vintage botanical prints.
  • Eclectic Organic Arrangements: Combine mixed frame materials (gilt gold, natural oak, and matte black) in varying sizes. Anchor the largest art piece slightly off-center and build smaller prints, textile art, and small decorative mirrors around it.
  • Paper Template Technique: Trace each picture frame onto craft paper, cut out the templates, and arrange them on the wall using low-tack painter’s tape. This allows you to fine-tune spacing and balance before driving a single picture nail into the wall.

Add Architectural Character with DIY Picture Frame Molding

Plain drywall can look flat, but adding applied wall molding (also known as picture frame molding or wainscoting) brings classic architectural depth to dining rooms, hallways, and master bedrooms.
Pre-primed polystyrene or lightweight polyurethane molding strips make this high-end look achievable in a single weekend without heavy industrial woodworking tools.
  • Measure the wall and calculate symmetrical box layouts, maintaining consistent three- to four-inch margins between boxes, baseboards, and ceiling crown molding.
  • Cut molding strips using an affordable manual miter box and hand saw to achieve crisp 45-degree corner joints.
  • Secure the molding to the drywall using strong construction adhesive paired with a few pneumatic brad nails.
  • Caulk all outer seams, fill corner nail holes with wood filler, and paint the molding to match the wall color for a seamless, luxurious custom-millwork aesthetic.

Quick-Impact Decor Updates Overview

Project Estimated Completion Time Skill Level Required Primary Visual Benefit
Accent Wall Painting 4 to 6 Hours Beginner Adds immediate color depth and creates a room focal point
Cabinet Hardware Replacement 2 to 3 Hours Beginner Modernizes dated millwork and kitchen cabinetry
Lighting Layering Upgrade 3 to 4 Hours Beginner to Intermediate Eliminates harsh shadows and warms interior atmosphere
Curated Gallery Wall 2 to 3 Hours Beginner Displays art cohesively and fills empty vertical wall spans
Applied Picture Frame Molding 6 to 8 Hours Intermediate Introduces historic architectural detail to plain drywall
Entryway Drop-Zone Setup 2 to 3 Hours Beginner Reduces clutter and organizes daily household essentials

Establish a Functional Entryway Drop Zone

The entryway creates the first impression of your home and handles daily arrivals and departures. An unorganized entry quickly turns into a cluttered drop zone for shoes, mail, keys, and coats.
Dedicate a Sunday afternoon to organizing an intentional, visually appealing entryway station.
  • Wall-Mounted Coat Rail: Mount a sturdy solid-wood peg rail or modern metal coat rack at eye level to keep jackets, backpacks, and dog leashes off the floor.
  • Narrow Console or Floating Shelf: In tight hallways, install a shallow floating shelf with a small ceramic catchall bowl to hold keys, sunglasses, and pocket essentials without impeding the walking path.
  • Full-Length Mirror: Hang a clean-lined arched or rectangular floor-length mirror near the door to bounce natural light down dark corridors while providing a convenient spot for final outfit checks.
  • Woven Storage Baskets: Place structured jute or canvas floor baskets underneath your entryway table to conceal stray footwear, umbrellas, and reusable shopping bags.
Investing a few focused hours over the weekend yields immediate, tangible improvements in your everyday living space. By tackling these self-contained decor updates one at a time, you can continuously refine your home, creating an environment that feels fresh, organized, and tailored to your lifestyle.

Frequently Asked Questions

What is the best paint finish to use for an interior accent wall?

An eggshell or satin finish is ideal for living rooms, dining spaces, and bedrooms because it provides a soft, low-sheen look while resisting everyday scuffs and remaining easy to clean. Flat or matte finishes hide wall imperfections well but are harder to wipe down, while semi-gloss and high-gloss finishes are best reserved for architectural trim, doors, and millwork.

How do I hang heavy frames on drywall without hitting a wall stud?

When a stud is not positioned where you want your artwork, use self-drilling screw-in zinc drywall anchors, expanding hollow-wall toggle bolts, or heavy-duty brass picture hanging hooks. Check the weight rating on the anchor packaging, and choose a fastener rated for at least double the weight of your framed piece to ensure secure long-term support.

Can peel-and-stick wallpaper be installed on textured drywall?

Peel-and-stick adhesive wallpapers adhere best to smooth, flat, primed drywall surfaces. If your walls feature heavy knockdown, orange peel, or popcorn textures, the adhesive may struggle to make full surface contact, causing bubbling or premature peeling. In textured rooms, skim-coat the wall with joint compound, sand it smooth, and prime it before wallpaper application, or opt for framed wallpaper panels instead.

How do I choose between warm-white and cool-white bulbs for home lighting?

Warm-white bulbs (2700K to 3000K) cast a soft, golden glow that enhances natural wood tones and creates a cozy, relaxing environment, making them the best choice for living rooms, dining rooms, and bedrooms. Cool-white bulbs (3500K to 4100K) produce a crisper, energetic light suited for task-heavy zones like home offices, garages, laundry rooms, and utility closets.

What is the simplest way to clean greasy kitchen cabinets before replacing hardware?

Before installing new knobs and pulls, wash cabinet door surfaces with a warm water solution mixed with a grease-cutting dish soap or mild trisodium phosphate (TSP) substitute. Wipe the surfaces down with a clean, damp microfiber cloth to remove residual cleaning agents, then dry them completely to prevent moisture damage to the cabinet finish.

How can I make low ceilings feel taller using curtain rods?

Mount your curtain rods four to six inches above the window frame, or just a few inches below the ceiling line, rather than directly atop the window molding. Combine this height with floor-length curtain panels that lightly graze the floor. This extends vertical sightlines, drawing the eyes upward and giving the illusion of significantly taller ceilings.

Do I need power tools to install applied wall molding?

No. You can complete an applied picture frame molding project entirely with hand tools. A simple plastic manual miter box with a fine-tooth hand saw will easily cut lightweight polystyrene molding strips, and strong construction adhesive can secure the trim directly to the wall. A basic hammer and small finish nails (or a handheld manual staple gun) can hold the pieces in place while the adhesive cures.
read more
Bathroom

Space-Saving Bathroom Design Ideas for Apartments

Urban apartment living often requires compromising on square footage, and the bathroom is frequently the most constrained room in the layout. A cramped bathroom can easily feel cluttered, chaotic, and frustrating during busy morning routines. However, limited floor space does not mean you have to sacrifice elegance, utility, or comfort.
Smart interior design relies on spatial awareness, visual tricks, and multi-functional fixtures. By rethinking the layout, using underutilized vertical zones, and choosing the right materials, you can transform a tiny apartment bathroom into an open, functional, and organized retreat.

Rethinking the Layout and Core Fixtures

The fundamental layout of your primary plumbing fixtures dictates how smoothly the room functions. In a compact footprint, standard-sized fixtures can overwhelm the space and block walking pathways.

Floating and Wall-Mounted Vanities

Traditional floor-mounted vanity cabinets consume significant visual and physical floor space. Replacing a bulky cabinet with a wall-hung floating vanity creates an unbroken sightline across the bathroom floor, tricking the brain into perceiving a larger area.
  • Open Floor Area: Exposing the floor underneath the sink makes cleaning simple and provides a designated spot for low-profile woven baskets or a non-slip step stool.
  • Streamlined Profiles: Many modern floating vanities feature shallow front-to-back depths, preserving precious walkway width without eliminating essential drawer storage.
  • Under-Cabinet Illumination: Adding a strip of soft LED lighting beneath a wall-hung unit adds depth and creates a warm, spa-like ambiance at night.

Compact Toilets and In-Wall Tanks

Standard two-piece toilets project far into a room, often interfering with shower doors or entryways. Opting for a compact-elongated bowl or a wall-hung toilet system saves valuable inches.
  • In-Wall Water Cisterns: By mounting the water tank inside the wall cavity behind the drywall, you can save up to eight to ten inches of front projection.
  • Corner Toilets: If your bathroom configuration is unusually angular or narrow, a triangle-tank toilet tucked into an unused corner frees up central floor space.
  • Integrated Bidet Seats: Replacing standalone hygiene products with an integrated bidet toilet seat reduces clutter while adding high-end functionality.

Walk-In Curbless Showers

Traditional shower-tub combinations break up a small room with high walls and opaque curtains. Replacing a bathtub with a continuous curbless walk-in shower immediately opens the entire room.
  • Frameless Glass Enclosures: Clear glass panels allow light to flow freely and eliminate visual barriers, making the entire bathroom feel like a singular open room.
  • Continuous Tile Flooring: Running the same floor tile seamlessly from the main bathroom area directly into the shower floor expands the apparent visual boundaries.
  • Linear Trench Drains: Installing a single-slope linear drain along the back wall removes the need for a center drain, allowing the use of large-format tiles without awkward cuts.

Mastering Vertical and Recessed Storage

When horizontal surface area is scarce, the best direction to build is up. Walls provide abundant, untapped potential for storage and organization that keeps counter surfaces clear.

Recessed Wall Niches and Medicine Cabinets

Building storage directly into the wall cavities between structural wall studs is one of the most effective ways to add storage without taking up an inch of usable room volume.
  • Shower Wall Niches: A tiled niche inside the shower stall keeps shampoo bottles, soap bars, and razors off the floor or hanging wire caddies.
  • Recessed Mirrored Cabinets: Swap standard surface-mount mirrors for mirrored medicine cabinets framed flush within the wall cavity. You retain a clean, flat aesthetic while gaining hidden storage for toiletries and medications.
  • Over-the-Toilet Wall Insets: Carving shallow recessed shelving into the drywall above the toilet provides an elegant display space for rolled hand towels, small plants, and fragrance diffusers.

Strategic Over-the-Toilet and High-Wall Shelving

The vertical wall space extending from the top of the toilet tank to the ceiling is often completely ignored in apartment bathrooms.
  • Floating Ladder Shelves: Open floating shelves crafted from light-toned timber or tempered glass add multi-tiered storage without the heavy visual mass of solid wood cabinets.
  • High Perimeter Storage: Installing a single continuous shelf high on the wall just below the ceiling creates an unobtrusive zone for storing extra rolls of toilet paper, seasonal items, and surplus linens in labeled canvas bins.
  • Back-of-Door Racks: Hanging low-profile multi-hook racks or hanging canvas organizers over the back of the bathroom door keeps daily robes, towels, and hair styling tools off the walls and counters.

Visual Design Strategies to Expand Perceived Space

Beyond physical dimensions, the way human eyes perceive room boundaries depends heavily on lighting, color harmony, and surface reflections.

Strategic Mirror Placement

Mirrors reflect natural and artificial light, immediately doubling the perceived visual depth of a room.
  • Oversized and Wall-to-Wall Mirrors: Installing a single large, unframed mirror spanning from the edge of the vanity across to the adjoining wall creates the illusion of an adjacent room.
  • Backlit Mirrors: LED-illuminated mirrors provide balanced, shadow-free illumination for grooming while eliminating the need for bulky, wall-mounted light fixtures that project into the room.
  • Opposing Mirror Angles: Placing a secondary decorative mirror opposite an open doorway bounces light entering from the hallway back into the bathroom.

Color Palettes and Light Reflectance

Dark, saturated paint colors can make wall planes feel like they are closing in. A cohesive, bright, and airy color strategy opens the room up.
  • Monochromatic Schemes: Utilizing subtle tonal variations of soft white, warm cream, or light grey on walls, tiles, and ceilings eliminates harsh dividing lines.
  • Vertical Tile Stacking: Installing subway tiles vertically instead of the traditional horizontal running bond pattern leads the eye toward the ceiling, creating an illusion of taller vertical clearance.
  • Gloss and Satin Finishes: Selecting tiles and semi-gloss paint finishes with high light reflectance helps bounce light around dim, windowless bathrooms.

Space-Saving Comparison Overview

Element Bulky Traditional Option Compact Modern Alternative Primary Space Benefit
Vanity Floor-standing cabinet Wall-mounted floating vanity Clears visible floor area and simplifies cleaning
Shower Barrier Opaque curtain or framed door Frameless fixed glass panel Eliminates visual interruption and opens sightlines
Toilet Two-piece standard floor mount Wall-hung unit with in-wall tank Recovers up to ten inches of front projection
Mirror Flat decorative hanging mirror Recessed mirrored medicine cabinet Hides daily countertop clutter behind the wall plane
Storage Free-standing floor linen tower Vertical floating or recessed wall shelving Maximizes overhead space without blocking walkways

Multi-Functional Accessories and Hardware

Carefully chosen hardware accessories provide essential storage solutions without cluttering limited surfaces.
  • Pocket Doors and Sliding Barn Doors: Traditional hinged swing doors require a wide radius of clear floor space to open. Installing an interior pocket door that slides into the wall framing recovers several square feet of functional floor area.
  • Heated Towel Bars: A slim, wall-mounted vertical towel warmer dries multiple wet towels efficiently, eliminating the need for bulky standalone towel racks or overfilled floor baskets.
  • Magnetic Grooming Strips: Placing a discreet magnetic strip inside a vanity drawer keeps bobby pins, nail clippers, tweezers, and small grooming scissors secured in one tidy spot.
  • Tiered Drawer Organizers: Custom drawer inserts divide deep vanity pull-outs into multi-level compartments, preventing small cosmetic items from getting lost in messy piles.
Transforming a compact apartment bathroom requires an intentional balance of clean layout design, smart vertical organization, and bright visual materials. By adopting floating fixtures, utilizing recessed wall framing, and using frameless glass, you can create a practical, comfortable room that feels surprisingly open and uncluttered.

Frequently Asked Questions

Can I install an in-wall toilet tank in a rented apartment?

Installing an in-wall toilet tank generally requires cutting into drywall and altering existing plumbing runs, which is typically prohibited by standard apartment lease agreements. Renters should instead explore non-invasive alternatives, such as low-profile over-the-toilet storage shelving, adhesive hanging organizers, or tension-pole corner shower caddies that require no permanent alterations.

How do I prevent moisture and mildew buildup in a small, windowless bathroom?

In windowless spaces, active ventilation is critical to prevent mold. Ensure your exhaust fan matches the room volume by choosing a model rated for sufficient cubic feet per minute airflow. Run the exhaust fan during every shower and leave it active for twenty minutes afterward. Alternatively, install a compact plug-in dehumidifier and use mold-resistant paints and anti-microbial grout additives.

What is the ideal vanity height for a floating installation in a small bathroom?

The modern standard comfort height for a floating vanity is between thirty-four and thirty-six inches from the finished floor to the top of the counter or sink basin. Installing the unit at this height prevents awkward bending while preserving eight to twelve inches of open clearance below the base of the cabinet for low-profile floor storage.

Are pocket doors soundproof enough for apartment bathrooms?

Standard hollow-core pocket doors provide less acoustic isolation than traditional hinged solid doors due to small perimeter gaps around the track. To improve privacy and sound dampening, choose a solid-core wood pocket door slab, install specialized brush seals along the jamb edges, and add acoustic insulation inside the surrounding wall cavity during installation.

What size tile works best to make a tiny bathroom look bigger?

Large-format tiles measuring twelve by twenty-four inches or larger work exceptionally well in small bathrooms. Larger tiles require fewer grout joints, creating a clean surface that makes the floor and walls feel expansive. If using smaller tiles like penny rounds or mosaics, select a matching grout color to avoid high-contrast grid patterns that make the room look busy.

How can I add extra lighting without hardwiring new electrical lines?

You can incorporate battery-operated or USB-rechargeable wireless LED light bars and puck lights. Mount them beneath floating shelves, inside vanity cabinets, or behind mirrors using removable adhesive strips. Many of these lights feature remote controls, motion sensors, and dimming settings, providing modern accent illumination without complex electrical renovations.

Is a fixed glass shower screen practical, or will water splash onto the bathroom floor?

A fixed glass shower panel is practical if the shower footprint is at least forty-eight to sixty inches long and the glass panel covers at least thirty to thirty-six inches of that length. Positioning the showerhead so water sprays directly down or toward an opposing tiled wall prevents water from splashing onto the dry areas of the bathroom.
read more
Architecture

Traditional Architecture Meets Modern Innovation

Architecture has always served as a mirror of human civilization, capturing cultural values, local materials, and environmental adaptations of each era. Throughout the twentieth century, the rapid rise of industrialization and globalization led to a widespread shift toward standardized construction. Concrete, glass, and steel towers began dominating urban skylines worldwide, often ignoring regional climate nuances and heritage.
In recent years, the architectural landscape has undergone a profound shift. Designers, engineers, and urban planners increasingly recognize that the future of the built environment relies on looking backward as well as forward. By merging indigenous vernacular wisdom with cutting-edge engineering, digital fabrication, and high-performance materials, contemporary architecture creates buildings that honor cultural memory while satisfying modern standards of sustainability, structural resilience, and comfort.

The Essence of Vernacular and Traditional Design

Traditional architecture is defined by its deep relationship with context. Before mechanical ventilation, electric lighting, and artificial heating existed, builders had to rely on natural physical principles to make structures comfortable. They refined these principles over centuries of trial and error.
Several core strategies define historic building practices:
  • Passive Thermal Regulation: Ancient structures made extensive use of thermal mass. Thick stone or rammed-earth walls absorbed intense daytime heat and released it slowly into living spaces during chilly nights.
  • Natural Airflow and Ventilation: Features such as Persian wind catchers (badgirs), Mediterranean interior courtyards, and raised wooden stilt structures across Southeast Asia maximized cross-ventilation, naturally cooling spaces without artificial power.
  • Locally Sourced Materials: Master builders used resources readily available in their surrounding ecosystems, including timber, clay, lime, thatch, and local stone. This localized supply chain minimized transport costs and kept structures harmonious with their native environments.
  • Microclimate Sensitivity: Roof pitches, overhang depths, window placements, and building orientations were calibrated to local rainfall, wind patterns, and solar paths.

The Drivers Behind Modern Innovation

While vernacular techniques offer time-tested environmental logic, modern urban centers face unprecedented challenges that historical methods cannot address alone. High population density, seismic safety codes, rapid urban expansion, and stringent energy regulations require advanced technological solutions.
Modern innovation contributes essential capabilities:
  • Advanced Structural Engineering: High-tensile alloys, lightweight composites, and seismic dampers allow structures to withstand extreme environmental pressures and accommodate thousands of occupants safely.
  • Computational Design and Simulation: Parametric modeling and Building Information Modeling (BIM) enable architects to simulate solar paths, wind aerodynamics, and thermodynamic exchanges down to the millimeter before construction starts.
  • Smart Building Automation: Automated sensor arrays, internet-of-things (IoT) environmental controls, and dynamic facade systems allow modern buildings to adapt in real time to shifting weather conditions.
  • Scalable Production: Computer Numerical Control (CNC) milling and large-scale 3D printing bring precision, speed, and reduced labor costs to complex structural and ornamental designs.

Bridging the Gap: Hybrid Methodologies in Action

The intersection of past and present is not a superficial stylistic pastiche; it represents a functional fusion where historical wisdom informs modern performance.

Revitalizing Ancient Materials with Advanced Chemistry

Natural materials like timber, earth, and lime are experiencing a renaissance, upgraded by contemporary material science.
  • Mass Timber and Cross-Laminated Timber (CLT): Traditional post-and-beam joinery methods from Japanese and Nordic carpentry have been scaled into high-strength mass timber panels. These materials sequester carbon, provide natural fire resistance, and offer structural strength comparable to steel and reinforced concrete.
  • Engineered Rammed Earth: Modern rammed-earth construction combines ancient clay-sand mixtures with non-toxic stabilizers, hydraulic presses, and internal steel reinforcement. The resulting walls retain their warm aesthetic and superior thermal mass while meeting modern seismic and load-bearing requirements.
  • Self-Healing Bio-Concrete Inspired by Roman Mortar: Modern researchers have analyzed ancient Roman maritime concrete, discovering that its durability stemmed from reactive volcanic ash and lime clasts. Modern material scientists now create self-healing concrete using mineral additions and bacterial cultures that seal micro-cracks when exposed to water, mimicking classical longevity.

Reinterpreting Passive Cooling Systems

The passive airflow mechanisms of ancient desert and Mediterranean architecture are now re-engineered using computational fluid dynamics (CFD).
  • Kinetic Mashrabiya Facades: The traditional Arabic mashrabiya—a carved wooden latticework screen that diffuses harsh direct sunlight while allowing breezes to filter through—is now built with mechanized aluminum louvers. Controlled by smart daylight sensors, these dynamic screens open and close automatically as the sun moves across the sky, slashing interior air-conditioning and artificial lighting demands.
  • High-Tech Solar Chimneys and Wind Towers: Modern institutions integrate high-tech solar chimneys that use natural buoyancy effects to pull hot air upward and exhaust it out of roofs, drawing fresh, cool air through subterranean geothermal intake pipes.

Structural and Functional Comparisons

Attribute Pure Traditional Architecture Pure Modernist Architecture Hybrid Traditional-Modern Architecture
Primary Material Palette Local stone, raw timber, earth, lime Concrete, structural steel, float glass Engineered mass timber, stabilized earth, smart glass
Climate Strategy Passive orientation and thermal mass Active mechanical systems (HVAC) Integrated passive design assisted by smart sensors
Carbon Footprint Extremely low embodied carbon High embodied and operational carbon Low embodied carbon with high operational efficiency
Cultural Context Highly localized and identity-specific Uniform, globalized, and standardized Regionally rooted with global engineering standards
Structural Scalability Low to medium density High density and vertical scale Scalable medium-to-high density structures

Cultural Identity in an Era of Globalization

Beyond thermal performance and carbon accounting, blending traditional styles with modern innovation addresses a growing human need for cultural continuity. Standard glass-and-steel skyscrapers often produce generic cityscapes that erase regional identity.
When architects reinterpret local forms using modern structural techniques, they restore a sense of place. A hospital in Scandinavia can incorporate light-maximizing Nordic timber vaults, while a corporate headquarters in South Asia can wrap around a central, shaded courtyard with cascading green walls. This balanced approach protects communities from losing their architectural roots, creating environments that feel culturally familiar yet modern.

The Path Forward for Sustainable Urbanism

As global populations expand and climate volatility intensifies, the construction sector must build responsibly. The answer does not require abandoning modern technological progress or romanticizing historic techniques that cannot scale.
The future belongs to hybrid thinking. By combining centuries of vernacular climate adaptation with high-performance computational modeling, sustainable material engineering, and intelligent building systems, architects can build cities that are sustainable, structurally sound, and culturally rich.

Frequently Asked Questions

How do building codes accommodate historic building materials like rammed earth or raw stone?

Modern building codes require standardized performance data for compressive strength, fire ratings, and seismic stability. To use traditional materials like rammed earth or unbaked clay, structural engineers conduct standardized laboratory stress tests, incorporate non-toxic stabilizers like lime or fly ash, and embed modern structural rebar or tension cables to satisfy local municipal safety criteria.

Does integrating traditional architectural details increase total construction costs?

While custom ornamental elements or non-standard materials can raise upfront fabrication costs, hybrid buildings often yield significant long-term savings. The enhanced natural daylighting, passive cross-ventilation, and high thermal mass inherited from vernacular design significantly reduce ongoing HVAC and electrical utility expenses throughout the building’s operating lifecycle.

Can mass timber structures match the fire resistance of steel and reinforced concrete?

Mass timber elements, such as cross-laminated timber, perform reliably in fire scenarios. When exposed to flames, the outer layer of thick timber chars at a slow, predictable rate, creating an insulating barrier that protects the inner structural core from heat damage and prevents structural collapse, often outperforming bare structural steel which softens under high temperatures.

How does adaptive reuse differ from hybrid new construction?

Adaptive reuse involves taking an existing historic structure and updating its interior systems, structural supports, and utilities for contemporary functions while keeping the original shell intact. Hybrid new construction builds a brand-new facility from the ground up, intentionally combining historic design concepts and vernacular material choices with modern engineering practices.

How do computer simulations improve ancient passive cooling concepts?

Historical builders relied on intuitive rules of thumb to shape and place passive cooling features. Modern computational fluid dynamics (CFD) and thermal simulation software allow architects to model exact air pressures, humidity shifts, and heat transfers under varied weather conditions, optimizing the size, angle, and position of courtyards, vents, and solar chimneys for maximum efficiency.

Are traditional-modern hybrid structures suitable for extreme cold climates?

Yes. Cold-climate vernacular traditions, such as steep roof slopes for shedding snow, compact layouts that minimize exposed surface area, and thick insulating turf or timber envelopes, translate effectively into modern cold-weather design when combined with triple-glazed smart windows, airtight building envelopes, and modern heat-recovery ventilation systems.

What role does local craftsmanship play in high-tech contemporary projects?

High-tech hybrid projects often rely on collaboration between master craftspeople and digital fabricators. Artisans contribute deep knowledge of natural material behaviors, joinery nuances, and regional masonry methods, which engineers translate into digital blueprints for CNC cutting, parametric fabrication, and on-site assembly.
read more
Plumbing

Plumbing Maintenance Tips Every Homeowner Should Follow

Plumbing is one of the most critical systems in any home, yet it is often the most neglected until a major problem occurs. A burst pipe, a flooded basement, or a persistent sewer line backup can cause thousands of dollars in structural damage and disrupt daily life within minutes. Fortunately, most plumbing emergencies do not happen spontaneously; they result from months or years of gradual wear, buildup, and deferred maintenance.
Taking a proactive approach to residential plumbing preserves water pressure, keeps utility bills manageable, and extends the lifespan of expensive fixtures and appliances. By incorporating simple, regular inspections and basic upkeep into your home maintenance schedule, you can protect your investment and avoid catastrophic water damage.

Know Your Main Water Shut-Off Valve

Before mastering routine maintenance tasks, every homeowner must know how to shut down the water supply in an emergency. If a supply line splits or a fixture fails, stopping the flow of water immediately is the only way to prevent severe flooding.
  • Locate the Valve: In most homes, the main shut-off valve is located in the basement, in a crawlspace, or near the water meter along the perimeter of the foundation where the main line enters the house. In warmer climates, it may be outside in an underground meter box near the street curb.
  • Identify the Valve Type: Traditional gate valves feature a round wheel handle that requires several clockwise turns to close. Modern ball valves use a straight lever handle; turning it ninety degrees perpendicular to the pipe completely shuts off the flow.
  • Test Operation Periodically: Turn the valve once or twice a year to ensure it has not seized from mineral buildup or corrosion. If the valve is stuck, contact a licensed plumber to replace it before an actual crisis occurs.

Prevent Drain Clogs and Chemical Damage

Drain clogs are among the most common plumbing nuisances. How you clear and prevent these obstructions determines whether your pipes remain durable or suffer premature corrosion.

The Dangers of Liquid Chemical Drain Cleaners

Many homeowners reach for commercial chemical drain openers at the first sign of a slow drain. These products typically contain harsh caustic chemicals, such as sodium hydroxide or sulfuric acid. While they generate intense heat to dissolve organic clogs, that same chemical heat can soften and warp PVC pipes, corrode aged cast-iron drain lines, and degrade the adhesive seals in pipe joints. Over time, frequent use leads to structural leaks inside walls and under floors.

Safe, Mechanical Clearing Methods

Instead of pouring caustic chemicals down your drains, adopt mechanical clearing methods:
  • Drain Snakes and Augers: Use a manual hand auger or a flexible plastic drain snake to extract hair and soap clogs directly from shower and sink drains.
  • Flanged and Cup Plungers: Keep a flat cup plunger for flat-bottom sinks and tubs, and a flanged plunger specifically for toilets. Plunging uses hydraulic pressure to dislodge blockages safely without introducing corrosive chemicals.
  • Baking Soda and Vinegar Flushes: For minor grease or soap scum buildup, pour one cup of baking soda down the drain followed by one cup of white distilled vinegar. Allow the mixture to fizz for fifteen minutes, then flush the line with a gallon of boiling water.

Optimize Kitchen Sink and Garbage Disposal Care

The kitchen sink handles substantial volumes of food residue, oils, and detergents daily. Misusing the garbage disposal is a leading cause of localized clogs and kitchen drain backups.
  • Avoid Fats, Oils, and Grease (FOG): Never pour warm cooking oils, melted animal fats, or butter down the drain. While liquid when hot, grease cools inside the trap and sewer lateral, congealing into solid blockages that catch other debris. Pour waste grease into a disposable container, let it solidify, and throw it in the trash.
  • Keep Fibrous and Starchy Foods Out: Avoid putting stringy vegetables like celery, corn husks, onion skins, and potato peels down the disposal. Fibrous strands tangle around the disposal impellers, while starches expand into a thick paste that clogs the trap.
  • Run Cold Water During Operation: Always run cold water before, during, and for thirty seconds after running the garbage disposal. Cold water keeps trace fats solidified so the blades can chop them into fine particles rather than letting them coat the pipe walls.
  • Deodorize and Clean Naturally: Grind ice cubes and citrus peels through the disposal every month to scour the grinding chamber and eliminate sour food odors.

Maintain Your Water Heater for Longevity and Efficiency

A water heater is one of the hardest-working appliances in a home, operating continuously under thermal stress and water pressure. Left unserviced, mineral deposits settle at the bottom of the tank, reducing heating efficiency and causing the tank bottom to overheat and leak.

Annual Tank Flushing

Dissolved minerals like calcium and magnesium precipitate out of heated water and form a dense sediment crust at the bottom of the tank.
  • Turn off the electrical breaker (for electric heaters) or switch the thermostat to the pilot setting (for gas units).
  • Connect a standard garden hose to the drain valve at the base of the tank and route the other end to an outdoor drain or floor drain.
  • Open the drain valve to let water flush out until it runs completely clear and free of sandy sediment flakes.
  • Perform this flush once a year to preserve heat transfer efficiency and prevent noisy tank rumbling.

Inspect the Sacrificial Anode Rod

Tank-style water heaters contain a sacrificial anode rod made of magnesium or aluminum. This rod attracts corrosive elements in the water, sacrificing itself so the steel tank walls remain protected. Check the anode rod every two to three years; if it has degraded to less than half an inch in thickness or its internal steel core wire is exposed, replace it immediately to prevent tank wall rust.

Monitor Household Water Pressure

High water pressure may feel luxurious in the shower, but excessive pressure places severe stress on your home’s entire plumbing infrastructure.
Water pressure exceeding eighty pounds per square inch (PSI) can blow out washing machine hoses, cause toilet fill valves to fail, accelerate faucet leaks, and void appliance warranties.
  • Test Pressure with a Gauge: Purchase an inexpensive pressure gauge that threads onto an outdoor hose bib or washing machine faucet. Measure the static pressure when no other water fixtures are running.
  • Adjust the Pressure Reducing Valve (PRV): Ideal household water pressure ranges between forty-five and sixty-five PSI. If your readings consistently exceed seventy-five PSI, inspect or adjust your home’s pressure reducing valve, typically located near the main water shut-off.

Prevent Seasonal Freeze Damage

Frozen pipes are a major cause of winter property damage. When water freezes inside a closed pipe, it expands by approximately nine percent, creating immense hydraulic pressure that ruptures copper, PEX, and PVC lines alike.
  • Disconnect Exterior Garden Hoses: Leaving an exterior hose attached to an outdoor spigot traps residual water inside the faucet body. When freezing temperatures hit, that trapped water freezes and splits the pipe behind the exterior siding.
  • Insulate Exposed Pipes: Wrap foam pipe sleeves or fiberglass insulation around unheated water lines in crawlspaces, basements, attics, and exterior-facing garage walls.
  • Allow Faucets to Drip During Extreme Freezes: When temperatures drop well below freezing for extended periods, leave a slight, steady drip running on faucets served by exterior walls. Moving water relieves internal pressure and significantly reduces the likelihood of freezing.

Essential Plumbing Maintenance Schedule

Frequency Maintenance Task Primary Purpose
Monthly Clean garbage disposal and clear hair traps Prevents odor and minor drain slowdowns
Quarterly Inspect toilet flappers and supply lines Catches silent leaks and prevents water waste
Semi-Annually Test water shut-off valves and pressure Ensures emergency valves work and limits pipe stress
Annually Flush water heater tank and test T&P valve Removes mineral sediment and prevents tank failure
Pre-Winter Disconnect hoses and insulate outdoor spigots Eliminates pipe burst hazards from freezing water

Frequently Asked Questions

How can I identify a silent toilet leak that is driving up my water bill?

A simple dye test will reveal a hidden toilet leak. Remove the tank lid and add ten to fifteen drops of food coloring into the water tank. Do not flush the toilet for twenty to thirty minutes. If colored water appears in the toilet bowl without flushing, the rubber flapper valve at the bottom of the tank is worn or warped and is letting water leak continuously.

What causes water pipes to bang or clunk when a faucet is shut off?

Loud banging sounds when a valve closes abruptly are known as water hammer. This phenomenon occurs when fast-moving water suddenly stops, sending a shockwave through the piping system. It can be resolved by installing mechanical water hammer arrestors near quick-closing appliances like washing machines and dishwashers, or by securing loose pipe straps along floor joists.

Is it safe to use drop-in blue chlorine tablets in the toilet tank?

Drop-in toilet tank bleach and chlorine tablets are not recommended. While they keep the bowl clean, the high concentration of caustic chemicals sitting directly in the tank degrades the rubber flapper, gaskets, and plastic fill valves prematurely, leading to silent leaks within six to twelve months.

How do I know if tree roots have invaded my main sewer line?

Common symptoms of tree root intrusion include multiple fixtures backing up simultaneously, gurgling sounds coming from toilet bowls when a washing machine drains, and foul sewage smells in lower-level drains. If you suspect roots, a licensed plumber can run a specialized diagnostic camera down the sewer lateral to confirm the obstruction.

Why does my tap water look cloudy or milky when it comes out of the faucet?

Cloudy or milky tap water that clears up after sitting in a glass for a minute or two is usually caused by harmless trapped air bubbles in the pressurized supply line. If the cloudiness does not dissipate and leaves white residue, it indicates high concentrations of dissolved minerals, commonly known as hard water, which may warrant the installation of a water softener.

How often should flexible braided supply lines on washing machines and toilets be replaced?

Flexible braided stainless steel supply lines should be inspected annually and proactively replaced every five to seven years. Even if the braided exterior appears intact, the inner rubber tubing can weaken, stiffen, and rupture under continuous water pressure, leading to sudden, high-volume indoor floods.

What should I do if my water heater temperature and pressure relief valve is leaking?

A dripping temperature and pressure (T&P) relief valve indicates either excessive pressure inside the tank, an overly high water temperature setting, or a failing valve seat. Lift the manual test lever briefly to flush out any debris that might prevent it from sealing. If the dripping continues after testing, lower the thermostat setting to 120 degrees Fahrenheit or replace the valve immediately, as a malfunctioning T&P valve compromises tank safety.
read more
1 2 3 6
Page 1 of 6