close

July 2026

Flooring

Creative Flooring Designs That Make a Strong First Impression

Flooring is often considered the foundation of interior design, yet it frequently receives less creative attention than wall colors, furniture, or lighting fixtures. When guests or prospective buyers step into a home, the floor is one of the very first design elements they register visually and physically. A well-conceived flooring concept sets the tone for the entire residence, establishing architectural intent, texture, depth, and personality.
Moving away from conventional, uniform flooring layouts allows homeowners and designers to convert plain floor planes into compelling design features. By integrating intricate geometric patterns, combining contrasting raw materials, and experimenting with customized finishes, you can craft spaces that captivate visitors from the moment they step across the threshold.

The Art of Geometric Woodwork: Herringbone, Chevron, and Parquetry

Hardwood remains a timeless flooring choice, but standard straight-plank installations can sometimes feel predictable. Laying natural timber in dynamic geometric formations introduces structural energy, historic sophistication, and visual rhythm to foyers, hallways, and central living areas.

Classic Herringbone and Crisp Chevron Patterns

Herringbone and chevron arrangements both use angled planks, yet their construction techniques produce distinct visual effects.
  • Herringbone Installation: Individual rectangular wooden planks are positioned perpendicularly in a staggered, overlapping 90-degree zig-zag. This pattern provides multidirectional stability, highlights organic grain variations, and draws the eye forward down entry corridors.
  • Chevron Precision: Chevron planks feature ends cut at precise 45-degree or 60-degree angles. When aligned edge-to-edge, they create a continuous, razor-sharp V-shaped seam that adds a tailored, contemporary feel reminiscent of classic Parisian townhomes.
  • Scale Variations: Using oversized, extra-wide engineered oak planks creates a modern, open ambiance, whereas narrow, antiqued walnut strips bring an intimate, historic character to formal dining rooms and libraries.

Intricate Parquet Inlays and Medallions

Custom parquetry turns wood flooring into intricate mosaic woodwork. Incorporating parquet medallions or Versailles panels in high-visibility areas like entrance foyers establishes an undeniable focal point. Using subtle tone variations, such as pairing white oak borders with rich walnut field tiles, defines spaces naturally without the need for physical partitions.

Seamless Material Transitions: Mixing Wood, Tile, and Stone

One of the most striking contemporary flooring trends is abandoning straight transitions and thresholds in favor of organic, mixed-material integration. Rather than separating living spaces and wet zones with abrupt metal trim pieces, modern designs allow natural wood planks and decorative tiles to merge fluidly.

The Hexagon-to-Plank Hex-Tile Gradient

Blending hexagonal porcelain or encaustic tiles into standard hardwood planks creates a visually striking transition between high-traffic entryways and living rooms.
  • Organic Interlocking Cuts: Floor layers cut hardwood planks to lock directly around the geometric edges of incoming hexagonal tiles, creating a scattered, dissolving effect across the room boundary.
  • Zone Differentiation: This technique brings durable, waterproof ceramic or natural slate protection to wet entryways and mudrooms while maintaining the warmth of natural wood in adjacent spaces.
  • Contrast Combinations: Pairing deep charcoal or patterned Moroccan encaustic tiles with pale, wire-brushed white oak delivers a bold, eye-catching visual transition.

Inlaid Metal Trim and Stone Accents

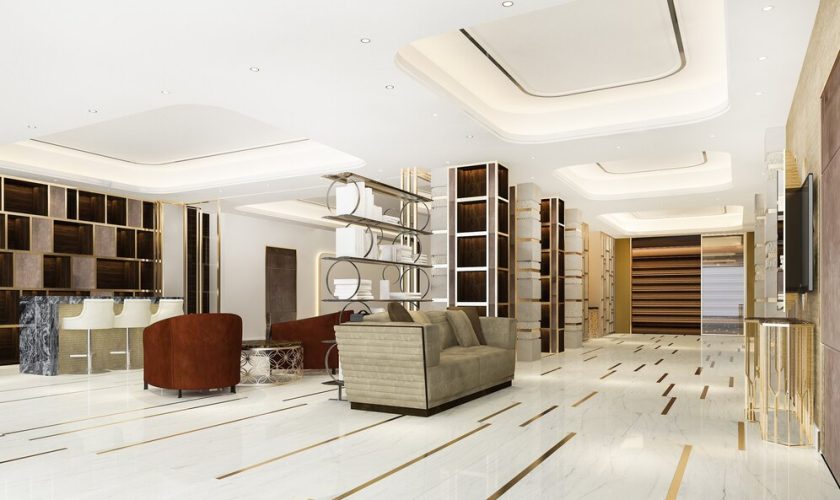
Incorporating slim brass, bronze, or blackened steel inlays between terrazzo slabs, polished concrete, or hardwood planks introduces subtle architectural luxury. These thin metallic transitions catch natural light, accentuate room boundaries, and highlight deliberate layout divisions.

Statement Tiles: Encaustic, Terrazzo, and Mosaic Expressions

Tile offers unmatched creative freedom through color, shape, pattern, and texture. Installing artistic tile designs in entryways, mudrooms, powder baths, and open kitchens creates an immediate visual impact that sets expectations for the entire home.

Handcrafted Encaustic Cement Tiles

Unlike glazed ceramic tiles where color is applied only to the top layer, encaustic cement tiles feature pigmented mineral patterns pressed deep into the tile body.
  • Artisanal Character: Slight imperfections and matte, chalky textures give cement tiles handmade warmth that synthetic surfaces cannot replicate.
  • Geometric and Botanical Motifs: From bold Spanish and Portuguese stars to delicate floral scrollwork, encaustic patterns transform narrow entryways into lively, welcoming spaces.
  • Rug-Style Inlays: Framing a patterned tile layout with a solid stone or porcelain border mimics the visual appeal of an area rug while retaining the durability and ease of cleaning of hard flooring.

Revitalized Custom Terrazzo

Once a staple of mid-century commercial architecture, terrazzo has returned as a premier residential flooring option. Made by setting chips of marble, quartz, granite, and colored glass into a cementitious or epoxy matrix, poured-in-place or large-format terrazzo tiles offer an exceptionally smooth, customized surface.
  • Custom Aggregate Blends: Homeowners can calibrate chip sizes and color tones, combining jade marble fragments with neutral stone matrices to echo subtle interior color accents.
  • Seamless Continuous Flow: Polished terrazzo delivers an expansive, light-reflective surface that makes small entry vestibules and compact living zones feel open, airy, and bright.

Industrial Minimalism: Polished, Stained, and Exposed Concrete

For contemporary, industrial, or minimalist interiors, concrete flooring offers a sleek, monolithic foundation that shifts attention to clean architectural lines, furniture silhouettes, and incoming natural daylight.
Refining concrete surfaces involves several creative approaches:
  • High-Gloss Diamond Polishing: Grinding the concrete surface with fine diamond abrasives produces a mirror-like finish that bounces ambient light across open-plan living areas.
  • Acid and Water-Based Staining: Acid stains react chemically with the free lime in cured concrete, producing rich, mottled tones reminiscent of natural travertine, leather, or aged slate.
  • Aggregate Exposure Levels: Heavy surface grinding reveals the internal sand and gravel aggregates, delivering an organic, salt-and-pepper or exposed-stone appearance that naturally disguises everyday dust and foot traffic.

Flooring Strategy and Visual Impact Breakdown

Flooring Design Concept Best Suited Areas Primary Visual Impact Maintenance Considerations
Herringbone / Chevron Wood Foyers, long hallways, open living rooms Lengthens sightlines and introduces refined geometry Requires standard hardwood care and humidity management
Hexagon Tile to Wood Gradient Entryways, kitchen-to-living transitions Creates artistic, seamless zone divisions Demands precision cutting and flexible expansion grouting
Encaustic Cement Rug Inlays Vestibules, powder rooms, mudrooms Delivers bold pattern focal points and historic charm Requires periodic penetrative sealing to prevent staining
Poured or Tiled Terrazzo Contemporary foyers, dining areas Bounces natural light and offers custom aggregate color Simple to clean, needs occasional mechanical repolishing
Polished Aggregate Concrete Industrial lofts, open-plan spaces Monolithic, modern, and uninterrupted floor flow Highly durable, needs sealed expansion joints and mopping

Layering Textures and Directional Flow

Creative flooring is not just about choosing bold colors; it involves strategically guiding movement and perception through the home.
Directing plank layouts toward primary architectural features—such as floor-to-ceiling windows, statement fireplaces, or garden vistas—draws the eye through the interior. Similarly, switching plank orientations or introducing decorative borders between adjoining rooms provides subtle spatial cues, making open floor plans feel organized and intentional without adding walls.
Investing in imaginative, high-craftsmanship flooring turns an everyday structural surface into a memorable design statement. By combining rich geometric woodwork, artistic tile transitions, and durable custom aggregates, you ensure your home leaves an unforgettable first impression on anyone who walks through the door.

Frequently Asked Questions

What type of flooring is best for high-traffic entryways in wet climates?

Porcelain tile, natural slate, and polished concrete are optimal for entryways in wet climates because they resist water penetration, mud, road salt, and abrasive grit. If natural wood is preferred, engineered hardwood with a durable aluminum oxide finish or high-quality wood-look porcelain tile provides superior moisture resistance compared to solid wood planks.

How do contractors handle height differences when blending tile and hardwood together?

Achieving a flush, smooth transition between dissimilar materials requires careful subfloor preparation. Contractors often apply self-leveling underlayment or use uncoupling membranes of varying thicknesses beneath the tile. This aligns the finished top surface of the tile perfectly with the height of the adjacent hardwood, eliminating tripping hazards and awkward transition strips.

Can encaustic cement tiles be installed over existing radiant floor heating systems?

Yes. Cement tiles have good thermal mass, allowing them to conduct and retain heat effectively over radiant heating systems. Installers must use a flexible, polymer-modified thin-set mortar and leave adequate perimeter expansion gaps to accommodate natural thermal expansion and contraction during seasonal temperature shifts.

How does the scale of a flooring pattern affect the perceived size of a room?

Large-scale patterns, such as wide-plank chevron or oversized large-format tiles, reduce visual clutter by minimizing visible grout lines and seams, making compact rooms feel larger and more open. Conversely, small, intricate patterns work well as defined focal accents in contained areas like entry vestibules and powder rooms.

Are concrete floors too hard or cold for standard residential living areas?

While concrete is inherently dense, pairing it with in-floor hydronic or electric radiant heating creates an evenly warm, comfortable living surface during cold seasons. Additionally, strategic placement of thick natural-fiber area rugs, wool runners, and upholstered furnishings softens acoustics and adds tactile comfort throughout the home.

How often do natural encaustic cement tiles need to be resealed?

Encaustic cement tiles are porous and lack a vitreous glaze, requiring application of a high-quality penetrative sealer immediately after installation and before grouting. In typical residential entryways and bathrooms, re-applying a breathable penetrative stone sealer every two to three years prevents liquid absorption, oils, and dirt from staining the pigments.

What is the primary difference between solid hardwood and engineered wood for geometric patterns?

Solid hardwood consists of single pieces of milled timber that expand and contract across their width with humidity changes, requiring careful climate control when installed in complex patterns. Engineered hardwood features a real hardwood veneer bonded over cross-laminated plywood layers, offering superior dimensional stability that resists warping and cupping in intricate herringbone or chevron installations.
read more
Kitchen

Kitchen Design Tips That Make Everyday Cooking More Enjoyable

The kitchen is often referred to as the heart of the home, but for anyone who cooks regularly, it is first and foremost a working laboratory. When a kitchen is poorly planned, preparing a simple weeknight meal can feel like an obstacle course of crossed paths, cluttered counters, and inaccessible tools. Conversely, a kitchen designed with culinary workflow in mind turns everyday meal preparation into a relaxing, creative experience.
Creating an enjoyable culinary environment requires more than choosing attractive tile or on-trend cabinet colors. True kitchen efficiency stems from ergonomic planning, logical zone organization, specialized task lighting, and thoughtful storage solutions. When every utensil, appliance, and prep surface is positioned with intention, the entire cooking process becomes seamless, safe, and genuinely satisfying.

Modernizing the Working Triangle into Functional Work Zones

For decades, the classic kitchen work triangle—connecting the sink, refrigerator, and range—served as the gold standard for layout design. While the triangle remains a helpful guideline, modern households often have multiple people using the kitchen at once for cooking, baking, entertaining, or cleaning. Expanding the classic triangle into dedicated functional work zones provides superior operational flow.

The Prep Zone

The food preparation zone is where cooks spend the vast majority of their time. This area requires uninterrupted counter space, ideally positioned between the water source and the primary cooking surface.
  • Continuous Countertop Space: Aim for at least thirty-six to forty-eight inches of continuous, unobstructed countertop specifically for chopping, mixing, and seasoning.
  • Integrated Waste Solutions: Install a pull-out double trash and recycling cabinet directly beneath or adjacent to the prep station. Incorporating a cutting board with a direct countertop cutout above the trash allows food scraps to be swept away instantly.
  • Knife and Board Proximity: Store chef knives in a dedicated wooden drawer insert or on a wall-mounted magnetic strip right at the prep station, accompanied by a vertical slot for cutting boards.

The Cooking Zone

The cooking zone centers around the cooktop, range, and wall ovens. Efficiency in this area minimizes the steps needed to transfer prepared ingredients into hot cookware.
  • Cookware Storage: Utilize deep drawers beneath the cooktop rather than traditional lower cabinets. Pull-out drawers allow full overhead visibility of heavy pots, cast-iron skillets, and saucepans without bending or reaching into dark corners.
  • Spice and Seasoning Pull-Outs: Install a narrow, four- to six-inch spice pull-out cabinet directly next to the range. Keeping salt, oils, vinegars, and frequently used dry spices within arm reach prevents sauces from burning while you search through a distant pantry.
  • Heat-Resistant Landing Spots: Ensure there is at least twelve to fifteen inches of heat-resistant countertop space on either side of the cooktop to safely set down hot pans and baking sheets straight from the oven.

The Cleaning and Scullery Zone

Separating the cleanup zone from the food preparation area prevents dirty dishes from encroaching on clean workspaces.
  • Undermount Sink Placement: Position the main sink near the dishwasher to create a smooth rinse-and-load workflow. An undermount sink allows crumbs and liquids to be wiped straight into the basin with a single sponge pass.
  • Dedicated Dish Storage: Store daily dinnerware, glasses, and silverware in upper cabinets or drawers located immediately adjacent to the dishwasher, making the unloading process fast and effortless.

Designing Ergonomic Storage That Eliminates Frustration

Cooking fatigue is often caused by unnecessary bending, stretching, and rummaging through overcrowded cabinets. Ergonomically sound storage systems bring tools directly to the cook, reducing physical strain.

Wide Base Drawers over Lower Cabinets

Traditional lower cabinets with fixed shelving waste substantial vertical space and force cooks to kneel down to reach items stored in the back. Replacing standard lower doors with wide, full-extension drawers revolutionizes kitchen ergonomics.
  • Heavy-Duty Undermount Slides: Soft-close, high-capacity drawer slides support heavy stacks of ceramic plates, enameled Dutch ovens, and small kitchen appliances effortlessly.
  • Adjustable Peg Systems: Deep drawers equipped with wooden pegboards allow you to customize dish storage, keeping bowls and plates securely separated and easy to lift out from waist height.

Specialized Appliance Garages

Small countertop appliances like stand mixers, blenders, and food processors can quickly overwhelm prep surfaces. An appliance garage keeps these heavy tools plugged in and accessible behind pocket doors, roll-up tambour doors, or bi-fold panels.
When you need to puree a soup or knead dough, the machine slides forward on a pull-out shelf. Once finished, the appliance glides back, and the doors close, leaving the countertops clean and clear.

Mastering Layered Kitchen Lighting

Dim or improperly placed lighting can make everyday cooking hazardous and visually exhausting. A single central ceiling fixture casts shadows directly over your hands when you lean forward over the countertop. A culinary-focused kitchen relies on three distinct layers of illumination.
  • Under-Cabinet Task Lighting: Position continuous warm-white LED light channels along the underside of all upper cabinets. This casts bright, shadow-free illumination directly onto your prep surfaces, cutting boards, and recipe books.
  • Overhead Recessed Lighting: Space recessed ceiling lights strategically along the perimeter of the room, aligning the beams with the edge of the countertops rather than the middle of the walkways. This prevents the cook from blocking the light source.
  • Accent and Ambient Fixtures: Decorative pendant lights over a central kitchen island and toe-kick lighting beneath base cabinets add warmth, depth, and character, making the room an inviting gathering space for family and guests.

Selecting Resilient, Low-Maintenance Countertop Materials

A surface that stains easily or requires delicate maintenance creates ongoing stress for the home cook. Choosing durable, non-porous surfaces ensures you spend your time enjoying meal preparation rather than worrying about citrus etching or oil absorption.
  • Engineered Quartz: Made from crushed natural quartz bound with polymer resins, engineered quartz is non-porous, scratch-resistant, and never requires periodic chemical sealing. It withstands acidic spills like lemon juice, tomato paste, and red wine with ease.
  • Sintered Stone and Porcelain Slabs: Fabricated under extreme heat and pressure, large-format porcelain slabs are entirely heatproof, UV-resistant, and impervious to scratches. You can place hot pots directly onto the surface without risking thermal shock or scorching.
  • Honed vs. Polished Finishes: While high-gloss polished finishes reflect light beautifully, honed (matte) or leathered textures do a superior job of disguising fingerprints, water spots, and micro-scratches caused by daily use.

Workflow and Kitchen Efficiency Matrix

Kitchen Zone Key Functional Elements Ideal Location Relative to Room Primary Cooking Benefit
Primary Prep Deep cutting surface, knife storage, compost drop Between sink and cooktop Streamlines ingredient staging and waste cleanup
Cooking Core Induction or gas burners, oven, spice pull-out Central wall or dedicated island run Eliminates steps when managing active cooking heat
Wet Scullery Deep single-basin sink, high-arc faucet, dishwasher Along an exterior wall or island side Keeps soiled cookware out of food preparation zones
Cold Storage Refrigerator, freezer, walk-in pantry Entry perimeter of the kitchen Allows family access to drinks without crossing cook path
Appliance Hub Coffee maker, toaster, stand mixer garage Out of primary cooking flow Prevents morning congestion in primary work zones

Incorporating Thoughtful Culinary Details

Small, purposeful design touches can transform standard kitchen routines into professional-grade experiences.
  • Pot Filler Faucet: Installing a swing-arm pot filler directly on the backsplash above the cooktop eliminates the physical strain of carrying heavy, water-filled stockpots across the kitchen floor.
  • Induction Cooktop Technology: Modern induction cooktops offer pinpoint temperature responsiveness, boiling water twice as fast as gas while keeping the glass surrounding the burner cool to the touch. Because the surface is completely flat, wiping up boil-overs takes mere seconds.
  • Deep Single-Bowl Sinks: Swap traditional double-bowl split sinks for an extra-deep, thirty- to thirty-six-inch single basin with an offset drain. A large single bowl easily accommodates oversized sheet pans, roasting dishes, and large soup pots that cannot fit into standard divided sinks.
An efficient kitchen is not defined by its square footage, but by how thoughtfully every inch is utilized. By organizing your layout into distinct functional zones, integrating ergonomic drawers, layering crisp task lighting, and choosing resilient work surfaces, you create a kitchen that removes friction from everyday routines and makes every cooking session a pleasure.

Frequently Asked Questions

What is the ideal distance between a kitchen island and surrounding countertops?

The ideal aisle width in a functional kitchen is forty-two inches for a single cook and forty-eight inches for households where multiple people cook together. Maintaining this clearance allows oven doors, dishwashers, and wide cabinet drawers to open fully without blocking foot traffic or bumping into opposing cabinetry.

How high should upper kitchen cabinets be installed above the countertop?

The standard height for mounting upper wall cabinets is eighteen inches above the finished countertop. This spacing provides ample vertical clearance for countertop appliances like blenders, stand mixers, and electric kettles while keeping items stored on the first two cabinet shelves within normal reach for most adults.

Are open shelves practical for everyday home cooks?

Open shelving works exceptionally well when reserved for items used on a daily basis, such as everyday dinner plates, coffee mugs, and water glasses, as high turnover prevents dust accumulation. However, open shelves located directly next to the cooktop should be avoided, as airborne cooking grease and steam will settle on exposed items, requiring frequent washing.

What type of range hood ventilation is best for frequent stovetop cooking?

A ducted range hood that vents exhaust air directly to the outside of the home is vastly superior to a ductless, recirculating model. Aim for a ventilation hood that provides at least three hundred to six hundred cubic feet per minute (CFM) of airflow, ensuring it captures airborne grease, steam, cooking odors, and combustion gases before they disperse into the home.

Why are drawers preferred over pull-out rollout trays behind cabinet doors?

Full-extension drawers require only a single physical motion to open and view the entire contents. Pull-out rollout trays hidden behind hinged cabinet doors require two steps: first swinging the doors fully open, then pulling out the internal tray. If the doors are not opened wide enough, rollout trays can scrape and damage the interior wood of the cabinet doors over time.

How do workstation sinks enhance food preparation?

Workstation sinks feature integrated interior ledges that hold custom-fitted accessories like sliding cutting boards, colanders, drying racks, and prep bowls directly over the sink basin. This allows cooks to wash, chop, and rinse vegetables directly over the drain, containing wet messes and saving valuable countertop space in compact kitchens.

What is the most functional placement for a microwave in a modern kitchen?

The most functional and ergonomic placements for a microwave are inside a built-in lower base cabinet, incorporated into a dedicated microwave drawer beneath the counter, or set at eye level within a tall wall-oven stack. Positioning a heavy, hot microwave high above a range hood creates reaching hazards when lifting boiling liquids and should be avoided whenever possible.
read more
Roofing

How Proper Roof Drainage Prevents Structural Damage

A roof does far more than shelter a building from the sun and wind. Its most vital engineering role is water management. During a heavy downpour, a standard residential or commercial roof collects thousands of gallons of water in a matter of minutes. Without a deliberate, efficient pathway to guide that volume away from the structure, water will inevitably find vulnerabilities, pool in low points, and inflict extensive structural damage.
Water is persistent and destructive. It seeps into minute cracks, softens load-bearing timber, corrodes steel fasteners, degrades foundation masonry, and fosters hazardous mold colonies. Investing attention and resources into an effective roof drainage network is not simply an exterior aesthetic choice; it is a fundamental requirement for maintaining the structural integrity and long-term market value of any building.

The Anatomy of an Efficient Roof Drainage System

A resilient roof drainage system is an integrated network designed to capture, direct, and discharge water safely away from a building’s footprint. The primary components vary depending on whether the structure features a pitched roof or a low-slope commercial roof, but the core mechanics remain consistent.

Core Drainage Components for Pitched Roofs

  • Gutters and Eaves Troughs: Open horizontal channels installed along the lower roof perimeter designed to catch runoff flowing down the roof slope.
  • Downspouts and Leaders: Vertical piping that conveys collected water from the roofline down to ground level.
  • Elbows, Offsets, and Extensions: Curved pipe segments that redirect flow around architectural trim and discharge water at least five to ten feet away from the foundation wall.
  • Gutter Aprons and Drip Edges: Metal flashing strips installed beneath shingles to prevent surface tension from pulling water backward onto the wooden fascia board and soffit.

Core Drainage Components for Low-Slope and Flat Roofs

  • Scuppers: Openings cut through exterior parapet walls that allow excess water to discharge directly into exterior conductor heads or downspouts.
  • Internal Drains: Depressed drain bowls installed within the roof membrane that channel water into internal drainage pipes running through the interior building envelope.
  • Secondary Emergency Overflow Drains: Auxiliary drain openings set slightly higher than primary drains to provide backup drainage if the primary system clogs during extreme storms.
  • Tapered Roof Insulation: Engineered insulation panels sloped intentionally toward drains to eliminate standing water pockets.

How Inadequate Drainage Damages Roof Decks and Trusses

When water fails to leave a roof quickly, the upper framing of the building suffers first. Continuous exposure to moisture degrades roofing materials from the outside in.

Ponding Water and Excessive Dead Load

On flat or low-slope roofs, poor slope design or blocked drains cause ponding water, defined as standing water that remains on a roof surface for forty-eight hours or longer after precipitation stops. Water weighs approximately 8.34 pounds per gallon, or about 62.4 pounds per cubic foot. A ponding area just one inch deep across a modest twenty-by-twenty-foot roof zone adds over two thousand pounds of dead weight.
This concentrated weight places severe stress on underlying rafters, joists, and structural trusses. Over time, the framing sags beneath the load, creating a deeper depression that captures even more water during subsequent storms. In extreme scenarios, this escalating cycle leads to catastrophic roof deck failure or total structural collapse.

Timber Rot, Fascia Decay, and Delamination

On pitched roofs, blocked or improperly sloped gutters cause water to back up beneath the bottom edges of shingles. Once moisture bypasses the protective water-resistive underlayment, it contacts the plywood or oriented strand board (OSB) roof sheathing.
  • Fungal Wood Decay: Prolonged dampness allows wood-destroying fungi to thrive, causing dry rot and wet rot that weakens the cellular structure of rafters and trusses.
  • Plywood Delamination: Moisture dissolves the resins bonding composite roof boards, causing them to swell, blister, and lose their load-bearing capacity.
  • Fascia and Soffit Rot: Water overflowing the back lip of a gutter saturates the wooden fascia board, causing gutter mounting brackets to pull loose and detach from the building.

Preventing Moisture Intrusion into Exterior Walls and Siding

When roof drainage fails, the building envelope bears the brunt of the runoff. Overflowing gutters act like a continuous waterfall sheeting down exterior wall surfaces.
  • Degradation of Exterior Siding: Continuous exposure to cascading water rots wooden clapboards, stains vinyl siding, causes stucco to crack and blister, and dissolves the mortar joints in brick veneer.
  • Insulation Saturation: Moisture penetrating exterior wall cavities saturates fiberglass batt and cellulose insulation. Wet insulation loses its thermal resistance, drives up heating and cooling expenses, and creates an ideal breeding ground for hidden mold inside living spaces.
  • Interior Wall and Ceiling Leaks: Once water navigates past the building wrap, it migrates horizontally along wall studs and ceiling joists, manifesting as bubbling paint, crumbling drywall, stained ceiling tiles, and warped hardwood floors.

Protecting Foundation Stability and Subterranean Structures

The most expensive structural damage caused by poor roof drainage occurs at ground level. A roof drainage system that terminates water right next to the foundation wall is just as dangerous as having no gutters at all.

Soil Saturation and Hydrostatic Pressure

Discharging hundreds of gallons of roof runoff next to basement walls saturates the backfill soil surrounding the foundation. As soil absorbs water, it expands and exerts tremendous lateral force, known as hydrostatic pressure, against foundation walls.
  • Wall Bowing and Structural Cracks: Hydrostatic pressure forces concrete block walls to bow inward and causes vertical, stair-step, and horizontal cracks in poured concrete foundations.
  • Basement Flooding: Water penetrates hairline fractures and cold joints in the foundation, pooling in basements and crawlspaces and damaging mechanical systems, furnaces, and stored goods.

Soil Erosion and Differential Settlement

Water pooling around the base of a building alters the load-bearing capacity of the underlying soil.
  • Differential Settlement: If one side of a house receives heavy, unmanaged roof runoff while the other remains dry, the wet soil softens and compresses under the building’s weight. The structure settles unevenly, causing foundation footing cracks, sloping interior floors, sticking doors, and sheared plumbing pipes.
  • Soil Erosion: Concentrated streams of uncontrolled downspout water scour away topsoil, exposing foundation footings to freeze-thaw cycles and causing severe ground erosion around support piers.

Roof Drainage Vulnerabilities and Structural Consequences

Drainage Failure Point Direct Physical Consequence Long-Term Structural Damage
Clogged Roof Gutters Water overflows behind fascia and over front lip Fascia board rot, detached gutters, siding decay
Flat Roof Ponding Water Massive dead load accumulation on roof deck Sagging rafters, membrane degradation, roof collapse
Missing Drip Edge Flashing Capillary action draws water beneath roof edge Sheathing rot, mold growth, decayed rafter tails
Short Downspout Discharge Runoff pools within 2 feet of foundation walls Hydrostatic pressure, foundation cracks, basement flooding
Blocked Scupper Openings Water backs up across low-slope roof planes Interior ceiling leaks, insulation failure, joist fatigue
Failed Flashing Around Drains Moisture penetrates sub-membrane layers Delamination of insulation boards, deck corrosion

Essential Maintenance Practices for Reliable Roof Drainage

Maintaining a reliable drainage network requires consistent seasonal oversight and deliberate inspections.
  • Perform Semi-Annual Cleanings: Clear leaves, twigs, pine needles, and roofing granules from all gutters, downspouts, and flat roof strainer baskets every spring and late autumn.
  • Maintain Proper Gutter Slope: Ensure gutters maintain a steady downward pitch of at least one-quarter inch for every ten feet of horizontal run toward the downspout to prevent stagnant pooling.
  • Extend Downspout Outlets: Install rigid metal or PVC downspout extensions that discharge water a minimum of five to ten feet away from the foundation, routing flow toward natural yard swales or underground French drains.
  • Install Gutter Guards in Wooded Zones: Micro-mesh gutter screens keep airborne debris out of the drainage channel while allowing high-volume rain to enter unobstructed.
  • Inspect Drainage Flashing Annually: Check sealants, counter-flashing, and boots around internal drain bowls, scuppers, and valleys to address cracks or separations before moisture reaches the sub-deck.
A functional roof drainage system is an indispensable defense for the entire building. By capturing rainwater at the roofline and safely escorting it far beyond the foundation perimeter, homeowners and property managers eliminate the primary drivers of rot, soil destabilization, and structural deterioration.

Frequently Asked Questions

How far should downspouts extend away from a house foundation?

Downspouts should discharge water at least five to ten feet away from the exterior foundation wall. In areas with expansive clay soils or steep downward grading toward the house, extending downspouts even farther or connecting them directly into buried solid PVC drain lines that empty into a municipal storm drain or dry well is recommended.

What is the primary difference between a primary and a secondary roof drain on a flat roof?

A primary roof drain sits flush with the finished roof membrane and handles routine rainfall runoff daily. A secondary emergency overflow drain is installed with its inlet elevated two to four inches above the primary drain. If the primary drain clogs during a storm, the secondary drain activates to prevent water from accumulating to structural failure thresholds.

Can overflowing gutters cause damage to a home during winter freezes?

Yes. During winter, clogged gutters fill with trapped water that freezes into solid ice. This ice expands, weighs down the gutter system, and promotes ice dam formation. Ice dams force melting snow to back up beneath the shingles, leading to severe winter attic leaks, wet insulation, and ceiling damage.

How do I know if my gutters are undersized for my roof area?

If water routinely cascades over the front edges of clean gutters during moderate-to-heavy rains, the system is likely undersized. Gutters must be sized based on total roof square footage, roof pitch, and local maximum rainfall intensity. Upgrading from standard five-inch K-style gutters to six-inch gutters nearly doubles the water carrying capacity.

What is a splash block, and is it sufficient on its own?

A splash block is a sloped concrete or plastic tray placed directly beneath a downspout elbow to prevent soil erosion at the discharge point. While splash blocks prevent ground gouging, they are often too short (two to three feet) to move water safely beyond the critical foundation backfill zone, making rigid pipe extensions a safer choice.

Why does improper roof drainage cause doors and windows to stick inside the house?

When roof water saturates the soil beneath one section of a foundation, that part of the house settles faster than surrounding areas. This uneven settlement twists the structural wall framing, causing rectangular door and window openings to become out of square, which makes sashes and doors bind against their jambs.

How does roof pitch influence the speed and volume of water runoff?

A steeper roof pitch accelerates the speed of water runoff. While steep slopes shed water rapidly and prevent ponding, the high velocity sends water into gutters with significant momentum, requiring wider gutter troughs, well-placed diverters in roof valleys, and adequately spaced downspouts to capture the flow without overshooting the eaves.
read more