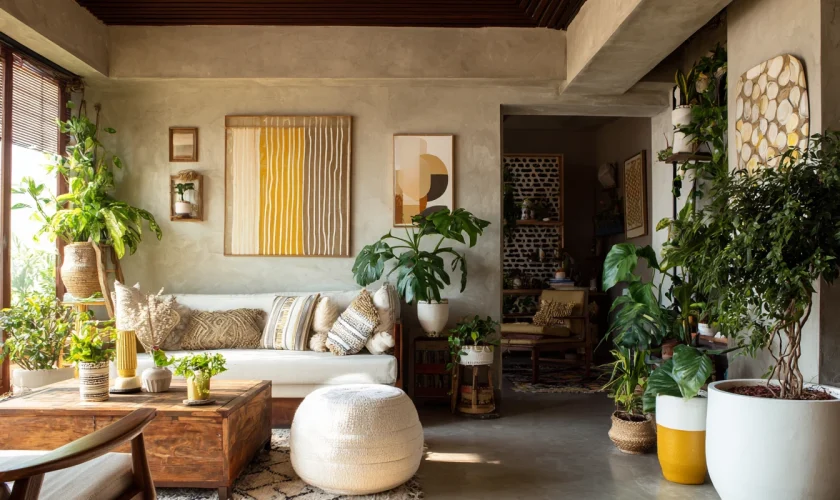
Refreshing your living environment does not require months of planning, noisy structural renovations, or an exorbitant budget. Over time, even the most thoughtfully curated spaces can begin to feel uninspired. Everyday routines cause rooms to settle into visual stagnation, but small, focused adjustments can dramatically alter how a home looks and feels.
A single weekend offers ample time to complete high-impact interior projects that instantly modernize your surroundings. By targeting strategic focal points such as lighting, accent walls, architectural details, and hardware, you can inject new personality and warmth into your home before Monday morning arrives.
Transform a Room with an Express Accent Wall
Paint remains the fastest, most economical tool for interior transformation. While repainting an entire living area can become an exhausting multi-day commitment, focusing on a single accent wall delivers maximum visual payoff with minimal effort.
An accent wall anchors the room, draws the eye toward architectural highlights, and introduces depth to neutral palettes.
-
Moody Saturated Hues: Deep jewel tones like navy blue, forest green, charcoal slate, or terracotta create an intimate, sophisticated ambiance in bedrooms, dining areas, and living rooms.
-
Textured Wallpaper Applications: Modern peel-and-stick wallpapers offer temporary, mess-free installation. Botanical prints, geometric patterns, or faux linen textures add rich physical depth without damaging the underlying drywall.
-
Wood Slat Paneling: Applying lightweight prefabricated wood acoustic slats to a focal wall provides Scandinavian warmth, improves room acoustics, and introduces organic linear symmetry.
Preparation is the secret to a professional finish. Spend Saturday morning cleaning the target surface, applying painter’s tape along baseboards and ceilings, and filling nail holes with spackle. By Saturday afternoon, you can roll two coats of paint or install adhesive wallpaper panels, leaving Sunday for styling and furniture placement.
Upgrade Cabinet Hardware and Interior Door Handles
Builders often install generic, low-cost hardware that fades into the background. Swapping builder-grade knobs, pulls, and hinges for modern designer hardware is an approachable DIY upgrade that immediately elevates kitchens, bathrooms, and interior doors.
This simple replacement can modernize decades-old cabinetry without the mess of sanding or repainting cabinet faces.
-
Finish Selection: Choose cohesive finishes across the space, such as matte black, brushed brass, satin nickel, or oil-rubbed bronze.
-
Knob and Pull Proportions: Upgrade standard round knobs to elongated bar pulls, textured knurled handles, or oversized cup pulls to give cabinets a custom, bespoke feel.
-
Standard Measurements: Measure the center-to-center hole spacing on existing cabinet doors before shopping to ensure new pulls slide into pre-drilled holes without the need for additional drilling or filling.
Equipped with a basic handheld screwdriver or a low-torque cordless drill, you can update an entire kitchen and two bathrooms in less than three hours.
Layer Ambient and Task Lighting
Lighting dictates the mood, tone, and perceived size of any interior. Many homes suffer from flat overhead lighting that washes out textures and casts unflattering shadows. Creating a warm, inviting atmosphere requires layering light across multiple heights.
A weekend lighting refresh involves replacing outdated fixtures and introducing dedicated accent light sources throughout your living spaces.
-
Swap Flush-Mount Fixtures: Replace dated glass dome lights in hallways, entryways, and bedrooms with sculptural semi-flush mounts, woven rattan pendants, or matte metal drum fixtures.
-
Incorporate Plug-In Wall Sconces: Hardwiring electrical boxes is time-consuming, but plug-in sconces featuring brass arms, fabric shades, or exposed filament bulbs mount directly to drywall anchors. Hide dangling cords inside paintable wire raceways for a clean, built-in appearance.
-
Under-Cabinet and Toe-Kick LED Strips: Apply peel-and-stick, warm-white LED light strips beneath upper kitchen cabinets and bathroom vanities to create functional task lighting and soft nighttime pathways.
-
Calibrate Bulb Temperatures: Replace mismatched, cool-white fluorescent bulbs with uniform warm-white LED bulbs rated between 2700K and 3000K to instantly soften room aesthetics.
Create a Curated Gallery Wall
Bare, expansive drywall can make a living room or hallway feel hollow and unfinished. Designing and assembling a curated gallery wall fills vertical space, introduces color, and showcases personal character.
A successful gallery wall balances structure with visual intrigue.
-
Grid Layouts: Use identical frames with wide white matting arranged in a strict geometric grid (such as a two-by-three or three-by-three layout). This approach looks balanced and works exceptionally well with architectural sketches, black-and-white family portraits, or vintage botanical prints.
-
Eclectic Organic Arrangements: Combine mixed frame materials (gilt gold, natural oak, and matte black) in varying sizes. Anchor the largest art piece slightly off-center and build smaller prints, textile art, and small decorative mirrors around it.
-
Paper Template Technique: Trace each picture frame onto craft paper, cut out the templates, and arrange them on the wall using low-tack painter’s tape. This allows you to fine-tune spacing and balance before driving a single picture nail into the wall.
Add Architectural Character with DIY Picture Frame Molding
Plain drywall can look flat, but adding applied wall molding (also known as picture frame molding or wainscoting) brings classic architectural depth to dining rooms, hallways, and master bedrooms.
Pre-primed polystyrene or lightweight polyurethane molding strips make this high-end look achievable in a single weekend without heavy industrial woodworking tools.
-
Measure the wall and calculate symmetrical box layouts, maintaining consistent three- to four-inch margins between boxes, baseboards, and ceiling crown molding.
-
Cut molding strips using an affordable manual miter box and hand saw to achieve crisp 45-degree corner joints.
-
Secure the molding to the drywall using strong construction adhesive paired with a few pneumatic brad nails.
-
Caulk all outer seams, fill corner nail holes with wood filler, and paint the molding to match the wall color for a seamless, luxurious custom-millwork aesthetic.
Quick-Impact Decor Updates Overview
| Project | Estimated Completion Time | Skill Level Required | Primary Visual Benefit |
| Accent Wall Painting | 4 to 6 Hours | Beginner | Adds immediate color depth and creates a room focal point |
| Cabinet Hardware Replacement | 2 to 3 Hours | Beginner | Modernizes dated millwork and kitchen cabinetry |
| Lighting Layering Upgrade | 3 to 4 Hours | Beginner to Intermediate | Eliminates harsh shadows and warms interior atmosphere |
| Curated Gallery Wall | 2 to 3 Hours | Beginner | Displays art cohesively and fills empty vertical wall spans |
| Applied Picture Frame Molding | 6 to 8 Hours | Intermediate | Introduces historic architectural detail to plain drywall |
| Entryway Drop-Zone Setup | 2 to 3 Hours | Beginner | Reduces clutter and organizes daily household essentials |
Establish a Functional Entryway Drop Zone
The entryway creates the first impression of your home and handles daily arrivals and departures. An unorganized entry quickly turns into a cluttered drop zone for shoes, mail, keys, and coats.
Dedicate a Sunday afternoon to organizing an intentional, visually appealing entryway station.
-
Wall-Mounted Coat Rail: Mount a sturdy solid-wood peg rail or modern metal coat rack at eye level to keep jackets, backpacks, and dog leashes off the floor.
-
Narrow Console or Floating Shelf: In tight hallways, install a shallow floating shelf with a small ceramic catchall bowl to hold keys, sunglasses, and pocket essentials without impeding the walking path.
-
Full-Length Mirror: Hang a clean-lined arched or rectangular floor-length mirror near the door to bounce natural light down dark corridors while providing a convenient spot for final outfit checks.
-
Woven Storage Baskets: Place structured jute or canvas floor baskets underneath your entryway table to conceal stray footwear, umbrellas, and reusable shopping bags.
Investing a few focused hours over the weekend yields immediate, tangible improvements in your everyday living space. By tackling these self-contained decor updates one at a time, you can continuously refine your home, creating an environment that feels fresh, organized, and tailored to your lifestyle.
Frequently Asked Questions
What is the best paint finish to use for an interior accent wall?
An eggshell or satin finish is ideal for living rooms, dining spaces, and bedrooms because it provides a soft, low-sheen look while resisting everyday scuffs and remaining easy to clean. Flat or matte finishes hide wall imperfections well but are harder to wipe down, while semi-gloss and high-gloss finishes are best reserved for architectural trim, doors, and millwork.
How do I hang heavy frames on drywall without hitting a wall stud?
When a stud is not positioned where you want your artwork, use self-drilling screw-in zinc drywall anchors, expanding hollow-wall toggle bolts, or heavy-duty brass picture hanging hooks. Check the weight rating on the anchor packaging, and choose a fastener rated for at least double the weight of your framed piece to ensure secure long-term support.
Can peel-and-stick wallpaper be installed on textured drywall?
Peel-and-stick adhesive wallpapers adhere best to smooth, flat, primed drywall surfaces. If your walls feature heavy knockdown, orange peel, or popcorn textures, the adhesive may struggle to make full surface contact, causing bubbling or premature peeling. In textured rooms, skim-coat the wall with joint compound, sand it smooth, and prime it before wallpaper application, or opt for framed wallpaper panels instead.
How do I choose between warm-white and cool-white bulbs for home lighting?
Warm-white bulbs (2700K to 3000K) cast a soft, golden glow that enhances natural wood tones and creates a cozy, relaxing environment, making them the best choice for living rooms, dining rooms, and bedrooms. Cool-white bulbs (3500K to 4100K) produce a crisper, energetic light suited for task-heavy zones like home offices, garages, laundry rooms, and utility closets.
What is the simplest way to clean greasy kitchen cabinets before replacing hardware?
Before installing new knobs and pulls, wash cabinet door surfaces with a warm water solution mixed with a grease-cutting dish soap or mild trisodium phosphate (TSP) substitute. Wipe the surfaces down with a clean, damp microfiber cloth to remove residual cleaning agents, then dry them completely to prevent moisture damage to the cabinet finish.
How can I make low ceilings feel taller using curtain rods?
Mount your curtain rods four to six inches above the window frame, or just a few inches below the ceiling line, rather than directly atop the window molding. Combine this height with floor-length curtain panels that lightly graze the floor. This extends vertical sightlines, drawing the eyes upward and giving the illusion of significantly taller ceilings.
Do I need power tools to install applied wall molding?
No. You can complete an applied picture frame molding project entirely with hand tools. A simple plastic manual miter box with a fine-tooth hand saw will easily cut lightweight polystyrene molding strips, and strong construction adhesive can secure the trim directly to the wall. A basic hammer and small finish nails (or a handheld manual staple gun) can hold the pieces in place while the adhesive cures.